Our Little Cabin Kitchen (with an IKEA hack!)


Guess what? Our little cabin kitchen (or should I say kitchenette) is finally finished! The cabinets have been in for a while, but the devil is in the detail, and all the hooks and doorknobs are now in place too! I'm looking forward to sharing all the details with you today!  

(See all the design plans for our 30 m2 / 322 f2 cabin on the Swedish West coast here). 

Inspiration

I love everything about the kitchen above by Nordiska Kök -  the grey-beige tone, clean look, the stone and the open wood shelves. I was also keen to bring in some dark grey stone to match the dramatic rocky shoreline in this part of Sweden. 

Floorplan

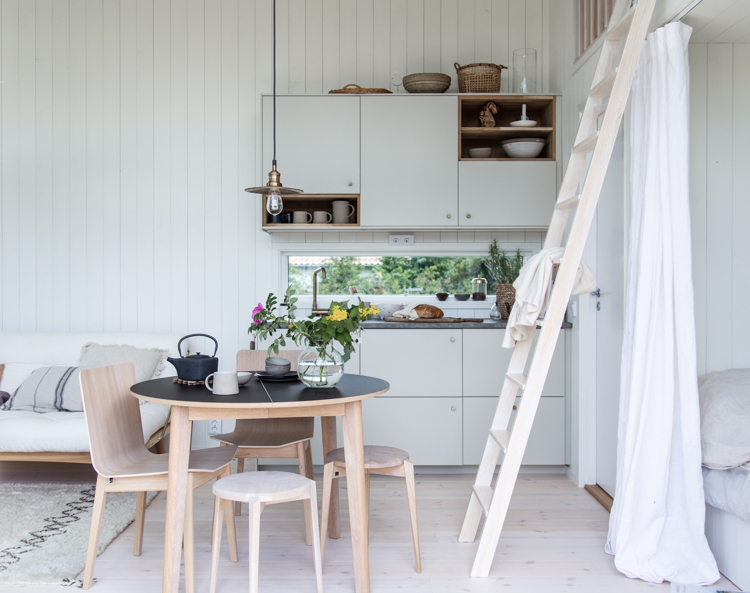
The designated kitchen area is small and centred around a mid-height window (174 cm wide). Even so we had several criteria: we needed a sink, fridge, small freezer, plenty of food storage and a recycling area. Notice that I haven't mentioned a stove or oven. 

We learned early on that installing a stove would mean it would become a property in its own right and would have electricity / water bill implications (gaaaah!) so we decided we'd use the stove in the main cottage for now. However, there are several options moving forward which include a gas barbecue, outdoor kitchen or even one of IKEA's pop up stoves. We'll see! 

Design

We explored many different kitchen brands, but to be honest, we simply couldn't believe how much even the tiniest of kitchens cost (have you found this too?) and since this is our second (little) home, they were all over our budget, so we had to get creative instead! 

When you're on a tight budget, I think IKEA kitchens are great. I'm a big fan of using them for the basics and then pepping them up by splurging on the details like the tap, handles and worktop. This is what we did in the main cottage kitchen several years ago, and I've been so happy with it! 

I also think the free IKEA kitchen planning service is great (no, this isn't sponsored by the Swedish giant, I promise!)  However, I was hoping to add a few personal touches, so I turned to my dear friend and interior designer Helen Sturesson for advice on how to incorporate hand-built shelves etc. And she sketched the above design. 

Ready to take a look at the results and find out more about the details? 

Results


We chose the Veddinge kitchen and then had it professionally spray painted by Swiss Metod / Lackera Köksluckor (my absolute go-to guys in Malmö) in Blek Sand (NCS S2005-Y20R). 
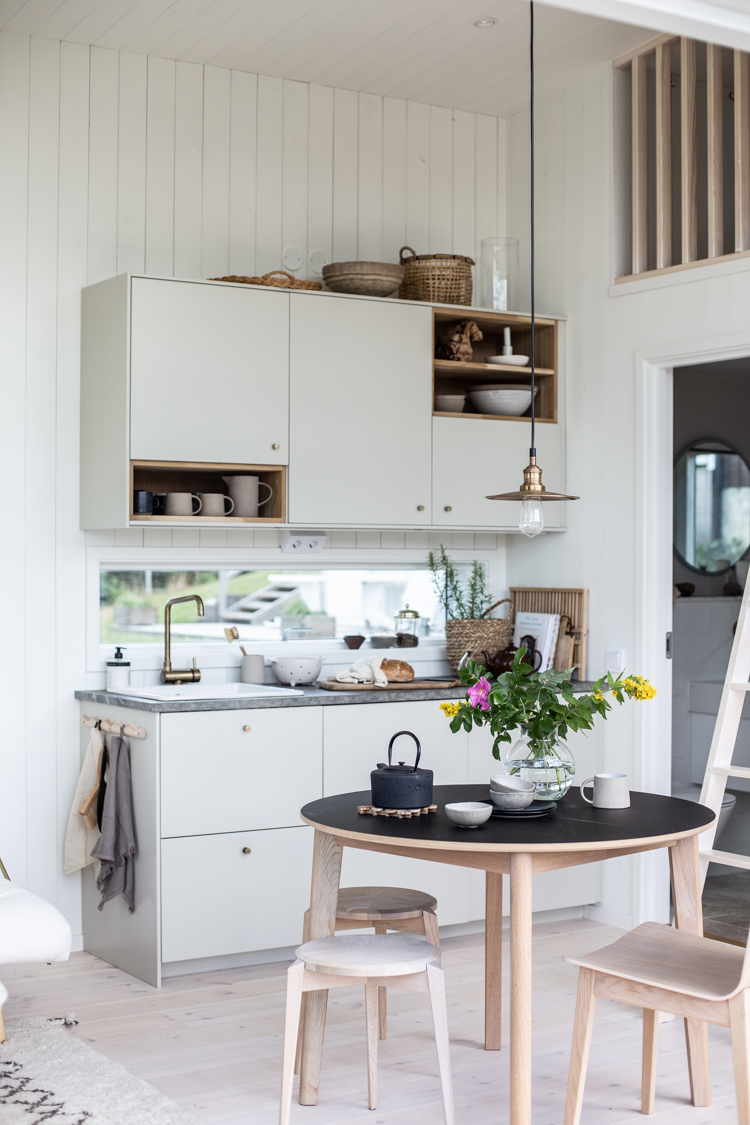
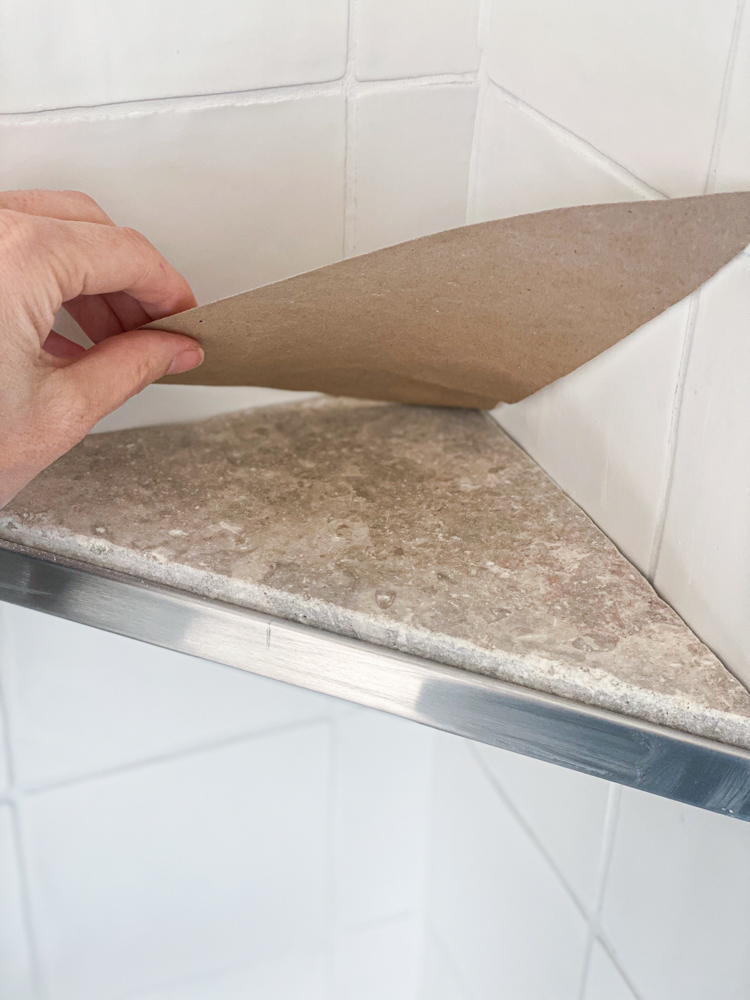

Worktop
I'd have loved a real stone worktop, but again our budget didn't quite reach for that now. I was really happy to find this laminate worktop at Hornbach. One day, maybe we'll swap it out for real stone, but I love this one for now! 

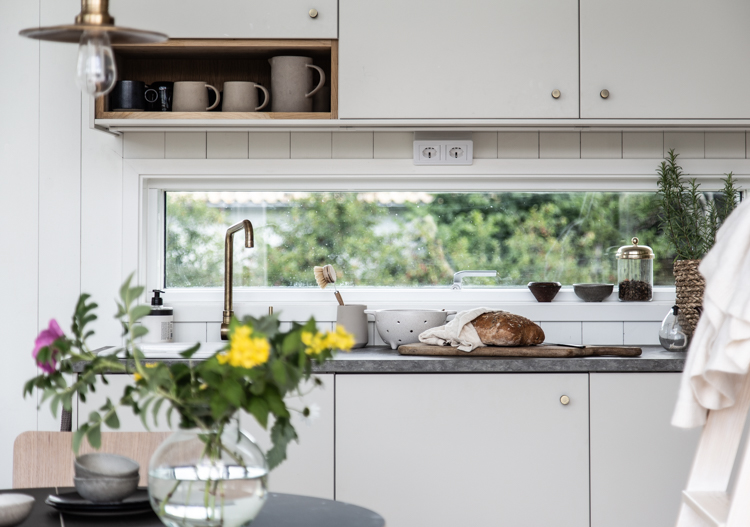
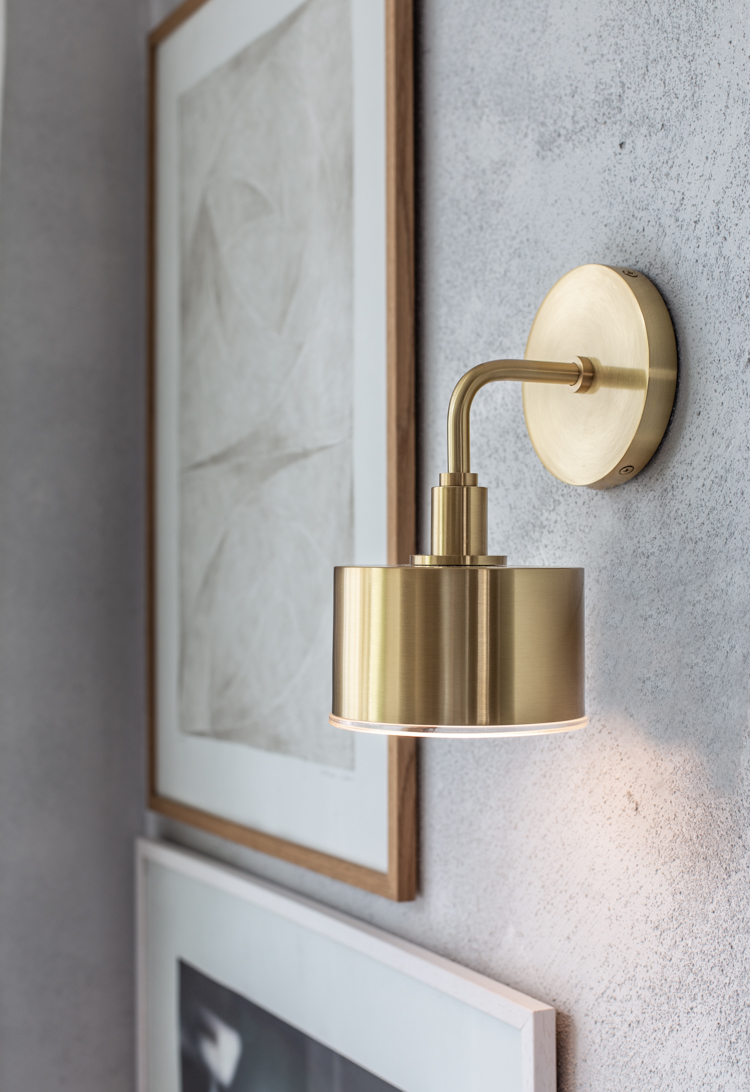
I think a high quality, beautiful tap is one of the most essential elements of a kitchen. It makes such a difference to the overall experience! We opted for the CRISTINA Rubinetterie CRIKT501 under window kitchen mixer in brushed old brass to match the bathroom taps. I love the finish!  

The sink is HAVSEN from Ikea

Handles


I was so happy to find these Cabinet Knob Helix - with a modern industrial vibe by Beslag Online (they have a load of beautiful knobs, hooks and furniture legs in their collection and sell throughout Europe).  The antique bronze matches the tap perfectly too! 

Shelves 


The open shelves were built by hand with oak slabs from Hornbach. I have to say, despite the faff, these are my favourite part of the kitchen - and so handy for cups and glasses and other items we use all the time. 

If we had installed a stove to the right, we wouldn't have been able to have these shelves there as we'd have needed to add a fan (I just wanted to point this out in case you're planning to do something similar). Maybe in the future, if we decide to get a stove, we'll have to do away with the upper right ones (sniff, sniff!). 

Lighting

An essential element - good lighting! In the above picture you can catch a glimpse of the subtle, Strömlinje LED light from IKEA which is connected to the wall switch and also has a remote control. The lighting is excellent, I have to say! 


We made one mistake. And that is that I should have used one panel instead of two on the front of the fridge (lower-centre). I got myself into a bit of a pickle with door handles - and may have used some photoshop trickery with this to show you how the end result will look with the knobs! However, in the long term I think I'll swap the two drawer fronts out to a single unit. What do you think? 

A few other things: 

We do have a kettle (hence all the teapots etc) - it's just not in shot!

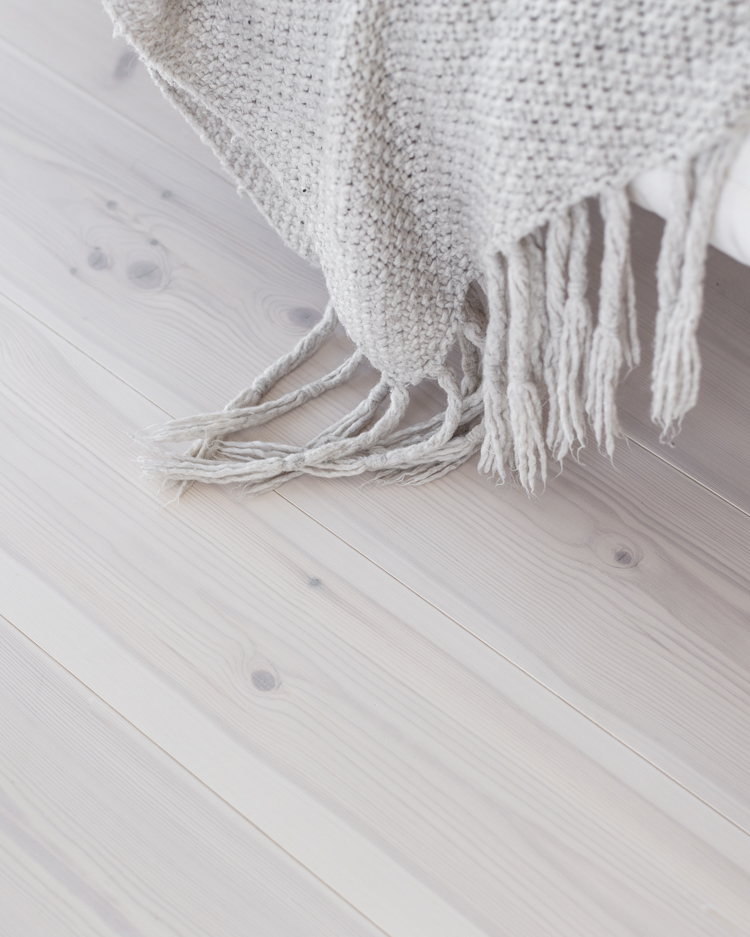
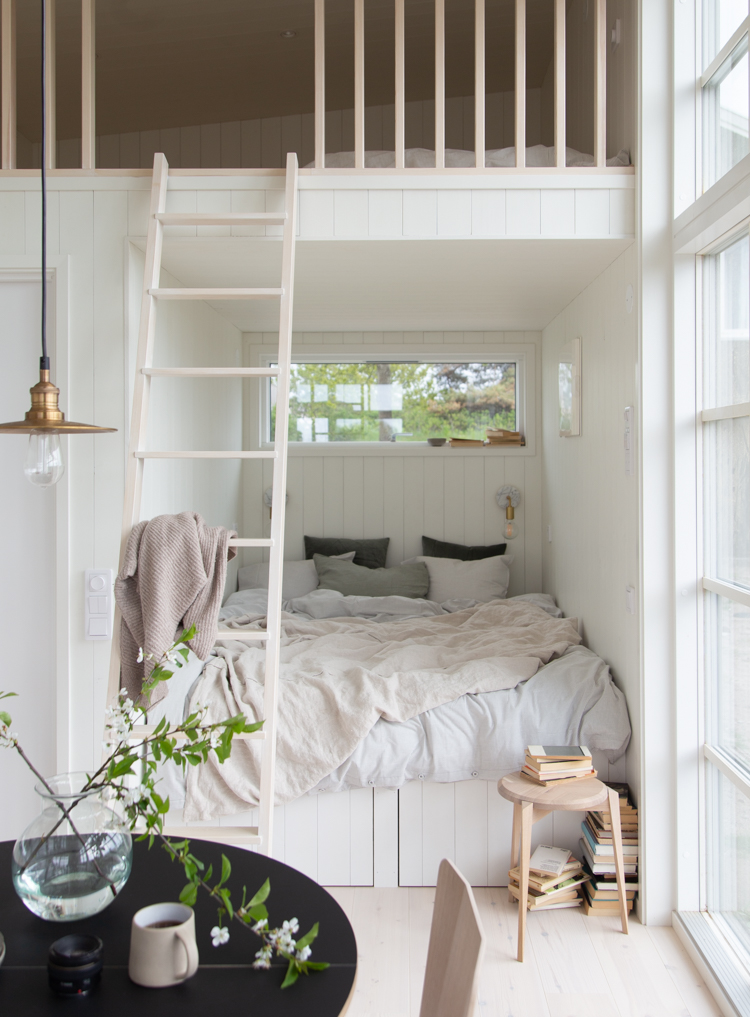
The extendable table and chairs are from Danish brand Skovby (see my post about them here) and the ladder - which can be moved across to the kitchen, was built by a local carpenter. You can find all the information about the wood floor and panelling (by Norrlands Trä) in my post here

I hope you like our little kitchen as much as we do! 

If you have any questions, please give me a shout in the comments below and I'd be happy to help. 

Have a great weekend all, see you Monday! 

Niki

Twitter FaceBook

Pin It
24

Cabin Update: The Lights Are On!


This is a paid partnership with Hudson valley Lighting Group. All words are my own and I only ever work with brands I love. 

The progress continues at the cabin! During the build we had spotlights fitted in the ceiling, which are all on dimmers. This set the basis for the lighting, and then I needed to add another layer - a more decorative one, but also directional to allow for reading, playing games etc. I.e. The fun part! Read on to see some pictures and find out more about the three new lamps in my life! 

Stanton floor lamp


This little gem in aged brass was the ideal choice for beside the sofa as it is height adjustable, and you can swivel the shade to direct the light. The black and white marble base makes for a great 'anchor' too (with Allie doing her gymnastics all over the shop, there's not much chance of it toppling over!). Find out more about the Stanton at Hudson Valley Group International here


Chloe wall sconce


You might recognise the lovely Chloe wall sconce by Mitzi, as I also have one in my sitting room at home. It's a favourite as I'm a big fan of the aged brass and light grey marble combination. For our bed alcove I opted for two - both connected to a dimmer switch so we can choose between a bright light for reading or a warm glow for ambience - this was important as it doubles up as somewhere cosy to relax in the open-plan living area! 

I love that this wall sconce works as decoration when not in use! 


Beside the lamp you'll notice a power source. The idea is to add a little rounded corner shelf at some point for phones and other tiny items like watches etc. All these details take time! 

Back home we added a third light from Hudson Valley Lighting Group: 

Nora Wall Sconce 

This fine Nora Wall Sconce by Mitzi brass wall sconce is part of the same family as Nora Pendant which I installed in Liv's room. It's available in two finishes: aged brass or polished nickel, but you know me, I love a golden touch! This lovely light added just the warm touch we were looking for in our window nook - day and night! It's probably the most coveted spot in our house, but I've got a feeling it will be even more inviting now! 

It's amazing what a difference lighting can make - whether to add decoration, create a warm and inviting feel, highlight a favourite painting or simply brighten up a corner. This weekend, why not do a light edit in your home and figure out what's missing. By adding a well-placed light you can completely transform an entire space and the way you use it! 

See the entire lighting collection over at Hudson Valley Lighting Group

Do you have a favourite? 

Right, I might just go and drink that cup of tea ('English breakfast'! - you can take a girl out of England, but you can't take England out of the girl!) and relax for a while before the family come home. 

Wishing you all a relaxing weekend. Vi ses på Måndag! 

Niki

Photography: Niki Brantmark / My Scandinavian Home
Styling at cabin: Helen Sturesson. Styling at home: Niki Brantmark

Twitter FaceBook

Pin It
4

I Found The Perfect Table and Chairs For Our Tiny cabin!


Paid partnership with  Skovby, all words and photos are my own and I only ever work with brands I love

Tjena! I hope you had a great weekend! We spent some time up at our little cabin and I'm really excited to share some snapshots of our new dining area with you. I can't begin to describe the feeling when we all sat down for our first family meal there (take-away pizza, so glam!).  

When it comes to furnishing a small space (30 m2 / 322 ft sq.) I've quickly learned that choosing less and choosing right is key, otherwise the space can quickly become cluttered.

These were the criteria I had in mind for our dining area:
1. The table needed to be small but still easily seat four
2. The table should be round to save space and avoid knocking into the corners
3. The table needed to be extendable for extra guests 
4. There should be extra seating which could be stacked to one side 


Danish brand Skovby has been a My Scandinavian Home partner for many years now - and I've always appreciated the high quality craftsmanship of their Denmark-made furniture (you might recall the glass cabinet, Per's deskthe coffee tables as well as countless other pieces). This little gem of a #120 dining table with white oil oak legs and a black laminate surface was the first to spring to mind for our cabin! 


The round table is a compact 102 cm in diameter and extendable with up to two leaves (available to buy separately), which means you can comfortably seat 6 or 8 people depending on how many leaves you add. Perfect! 

Chair wise, I chose the #807 dining chair in oak white oil. You know me, I love wood, it has such a warm feel, and the shell shape has some flex which makes it comfy. But if you want to go all out on the comfort, this model is available with upholstery for a soft touch, and the #802 version also comes with armrests.

I also picked up some #840 stools (in oak white oil) which can be stacked to the side when not in use (we've also already used them as a bedside table, sofa side table and a footrest!).  

I love that its sustainably made from leftover production wood (I first spotted it during my visit to the Danish Skovby carpenter workshop earlier this spring and picked one up there and then!). 


I hope you like the table and chairs as much as we do! In case you're interested in any of these pieces for your own small space, Skovby is available almost worldwide (find your nearest stockist here).

Incidentally, the table is available in 9 different finishes including oak white oil and white laminate tops - you can see all the variations here

In case you're wondering about the ladder, it can be removed and placed elsewhere when needed - but I guess someone could perch there too!

Give me a shout if you have any questions about anything in these pictures -I'd be happy to help! If you'd like to add any small space tips and tricks of your own, I'm all ears as the cabin is far from finished! 

I hope to be able to share a post about our kitchen - including all the details - soon (look closely and you'll see the knobs are missing). Watch this space! 

Wishing you all a great start to the week! 

Niki 

Photography: Niki Brantmark / My Scandinavian Home

Twitter FaceBook

Pin It
13

Tiny Cabin Update: Panelling, Wood floors & Our Cosy Bed Nook


Disclosure: Norrlands Trä have kindly agreed to collaborate with us on this project

Things are taking shape in our little cabin at a rapid pace, so I felt it was time for an update!

Here's the lowdown and a few snapshots - plus I'm looking for some advice on the mattress situation further down the post (looking at you van owners!), please feel free to share your tips in the comment section and ask any questions!

Wall and ceiling panels

As you know, we were adamant about having panelling as we felt it would be a great way to create a relaxed coastal cabin feel. Are you a fan too? 

Having researched the various different styles of panelling - from contemporary to traditional we settled on the more modern Borstad Slätspont in white S0502-Y from Swedish brand Norrlands Trä

The wall and ceiling panelling gave the cabin an instant lift and feels contemporary yet coastal, smart yet relaxed - I love it when a plan comes together! 

Wood floor
The day I took the above picture it was freezing outside, and I couldn't help thinking how 'cold' the cabin felt with the concrete foundation. So, I quickly got to work on finding a wood floor.

We decided on the primed parquet pine floor in ultra protect white, also from Norrlands Trä. Light pine is a classic choice for Swedish summer cottages as it has a pared back, understated feel yet still has that wonderful softness and warmth. 

Side note: Pine is soft, which means it can be dented / marked quite easily. If you do go for this type of flooring, it's something you ned to bear in mind. We figured that wood is a living, breathing material which changes with time, and we'd embrace any marks the family make! Having said that, we'll be laying rugs in 'high flow' spots such as the kitchen, living room and dining area to protect the floor and add that all important hygge! 

After: 


I love that you can clearly see the grain and knots in the wood, it really helps to draw nature indoors and adds texture and depth to the space. 


The bed nook
In our plans, we included a nook for a 160 cm bed (with more space bunks in the loft). Since the cabin is small (30 m2 / 322 sq ft) it would also need to double up as storage without compromising on aesthetics (you know me!). Below is how the space looked during the build (while being surveyed by Per!):


This is how it looked once the panelling, floor and railings went in:

And finally, The bed nook
I did a ton of research into 160 cm beds with front storage but couldn't find anything! So, in the end we designed a wall-mounted bed platform with central legs and two VERY long pull-out drawers on wheels (see below). Leftover panels were used for the fronts for a seamless look. 

And we finally had a bed! 

Sidenote: we're working on the air circulation -most likely, we'll drill holes in the base and also add a special air circulator layer under the mattress (without this, bacteria can build up and a mattress can quickly become mouldy underneath). This still a work in progress though, so tips are very welcome! 

In the meantime, we're so looking forward to sleeping and hanging out right here. So excited!

I hope you enjoyed this update! Please do give me a shout below if you have any questions. 

I'm so looking forward to sharing other areas of the cabin with you soon. 

Wishing you a trevlig helg! (lovely weekend!), 

Niki 

Twitter FaceBook

Pin It
36

Tiny Cabin Bathroom Sneak Peek - Plus a Few Questions!

*GSI Ceramica and Cristina Rubinetterie are kindly partnering in our project. 

I can't tell you how much progress we've made in the bathroom at the cabin* since I shared the original plans. After a copious amount of work (who knew a 3.6 m2 (38f2) bathroom could take up so much time?), it's finally coming together! In fact, it's almost finished, woohoooo! Here are some snapshots of the progress which I snapped with my phone. Oh, and I'd love to hear your thoughts on some of the final details too. 

It's been fun to see the space come together - one layer at a time, starting from the bare bones. 

Wall tiles
For the shower and lower section of the wall we chose matt white square tiles with a simple white grouting (I felt this would give a cleaner, less fussy look in such a small space). 

Wall mounted loo and taps
I love a wall hung loo (specifically the WC Kube X from GSI Ceramica) they look so sleek and also help to contribute to an airier feel in a small space. I was also keen to install wall mounted taps (I selected the Basin Mixer CRITV257 from series Tricolore Verde by CRISTINA Rubinetterie)However, in order to achieve this we needed to build out a section of the wall by 15 cm (wide enough to fit a Gerberit cistern). I was a little nervous as it's already a narrow bathroom - but actually, I'm thrilled with the result. The shelf has turned out to be a real bonus!  

Bathroom paint colour
For the ceiling and walls (without tiles) I went for Kalk from the Jotun Lady Aqua bathroom range. It's a lovely, soft, warm tone which compliments the matt white sink and loo as well as the stone floor. 

Wall mounted sink and cabinet
Here's a close up of the sleek, timeless Kube X washbasin (60 x 47) in matt white. I'm so happy with it as well as the Prisma Unit cabinet (also from GSI Ceramica) - it's perfect for storage, and since the entire unit is mounted, it gives the illusion of space. 

Taps and shower
Above and below you can see a close up of the basin Mixer CRITV257 and External Thermostatic shower mixer with overhead and hand shower CRITV486 from CRISTINA Rubinetterie. The 'brushed old brass' finish has a beautiful patina and adds so much texture. 

Shower door
We still need to add a glass wall (80 cm wide) between the shower and sink. However, I haven't decided if we also need a shower door (70 cm wide) across the front, what do you think? 

Floor tiles and details
And finally - the stone floor. I sourced the Tumbled Turtle tiles from Swedish brand Stiltje (I love the owner Pamela; she has incredible taste!). We really splurged on these and once the floor had been laid, there were a few tiles leftover which we used for the ledge above the sink and a corner shelf in the shower.  

I hope you like what we've done so far! I'm so excited the bathroom is nearly finished. We're on the home straight! 
 
The next step is to add:

1. A shower wall and potentially a shower door 
2. A privacy film inside the garden glass door (or should we go for a blind?) 
3. A loo roll holder - any thoughts on where this should go? 
4. Hooks for towels, robes, swimwear etc. 
5. All our toiletries! 

I'd love to hear your two pennies worth! 

Hopefully it will all be finished in the next few weeks - I'm so looking forward to sharing the final reveal once everything is in place!

Niki

All photos taken with my iPhone. 

*For those of you who are new to My Scandinavian Home - Per and I are building a 30 m2 (323 f2) cabin in the garden of my Mother-in-law's summer cottage on Sweden's West coast. You can see the plans here

Twitter FaceBook

Pin It
25

Subscribe To My Scandinavian Home

Subscribe to My Scandinavian Home

skovby ad


site by ANAAR

This website uses cookies to ensure you get the best experience on our website.
MORE INFO