Scrolling

How To Make Swedish Christmas Angels From Paper

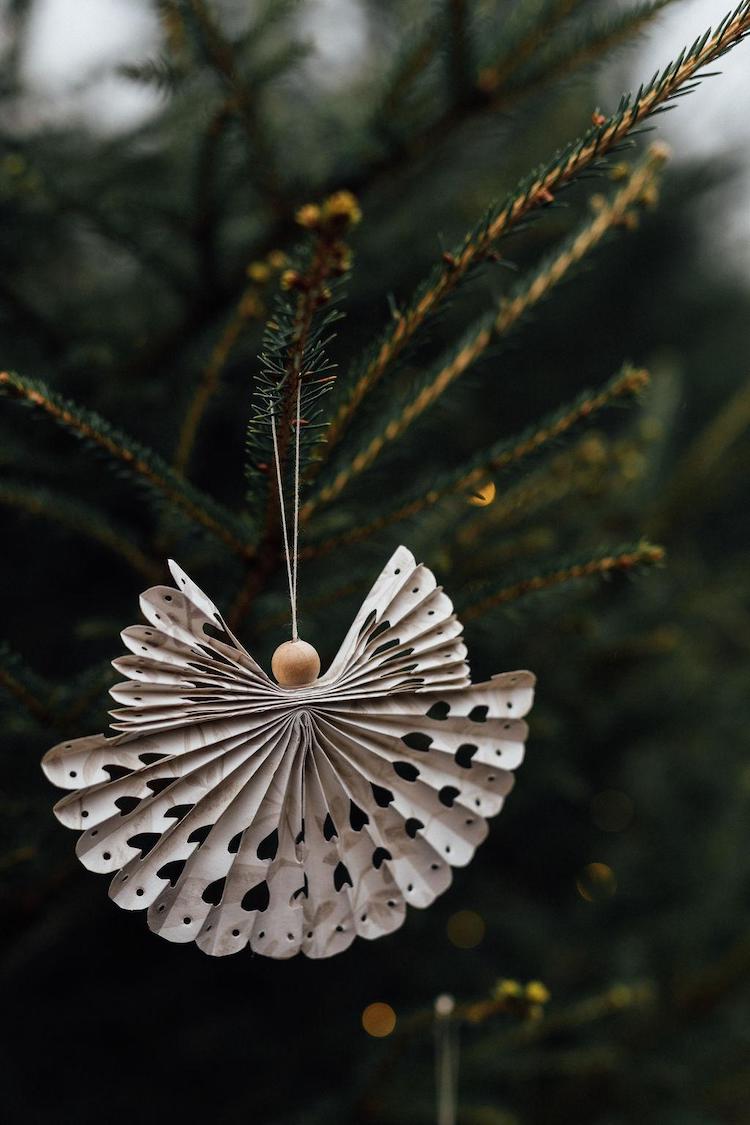
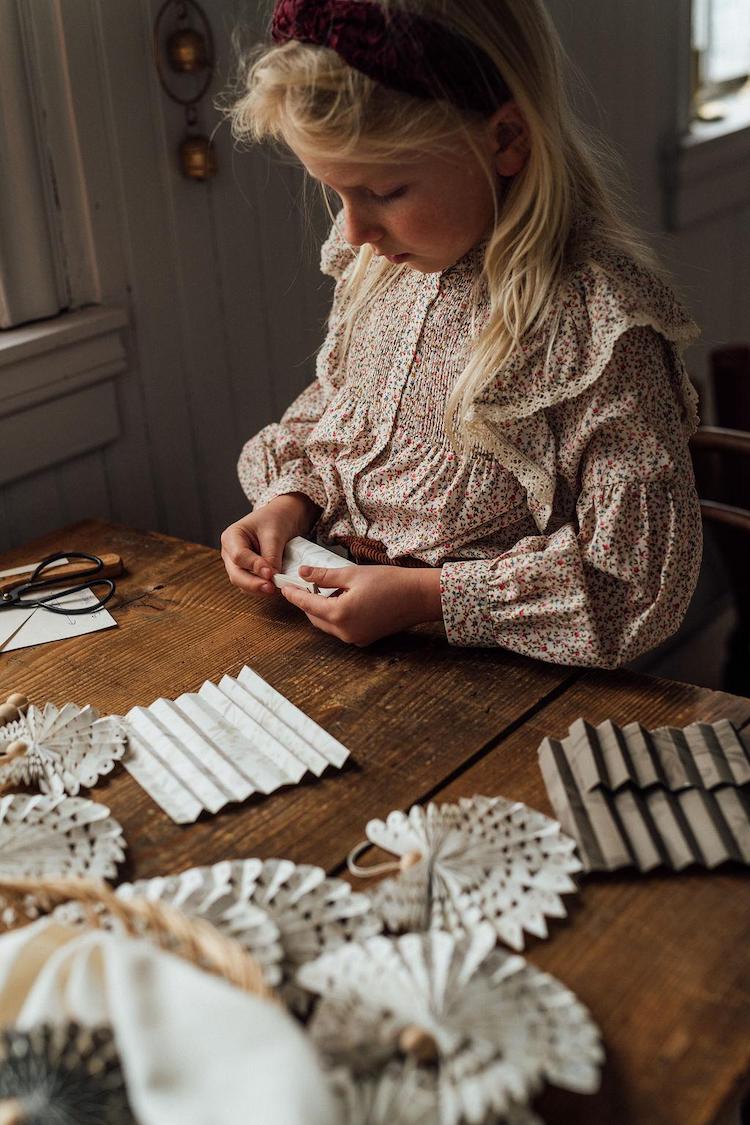
Swedish photographer Malin Mörner has been at it again - this time creating the most beautiful DIY paper Christmas angels.  You might recall her DIY baubles, paper chains and stars last year, and now Malin has shared the step-by-step instructions on how to create this Christmas decoration out of wallpaper.  Read on to discover how to make your own 'choir of angels'! 

What you need: 
- Paper
- Wooden beads
- White cotton thread
- Glue gun
- Double sided sticky tape
- Hole punch
- Sewing needle 

What to do: 

1. Cut the paper into sections according to the following measurements: 
To make small angels: wings 8 x 12 cm, skirt: 11.5 x 13 cm (width x height)
To make big angels: wings: 11.5 x 14 cm, skirt 14 x 16 cm (width x height)

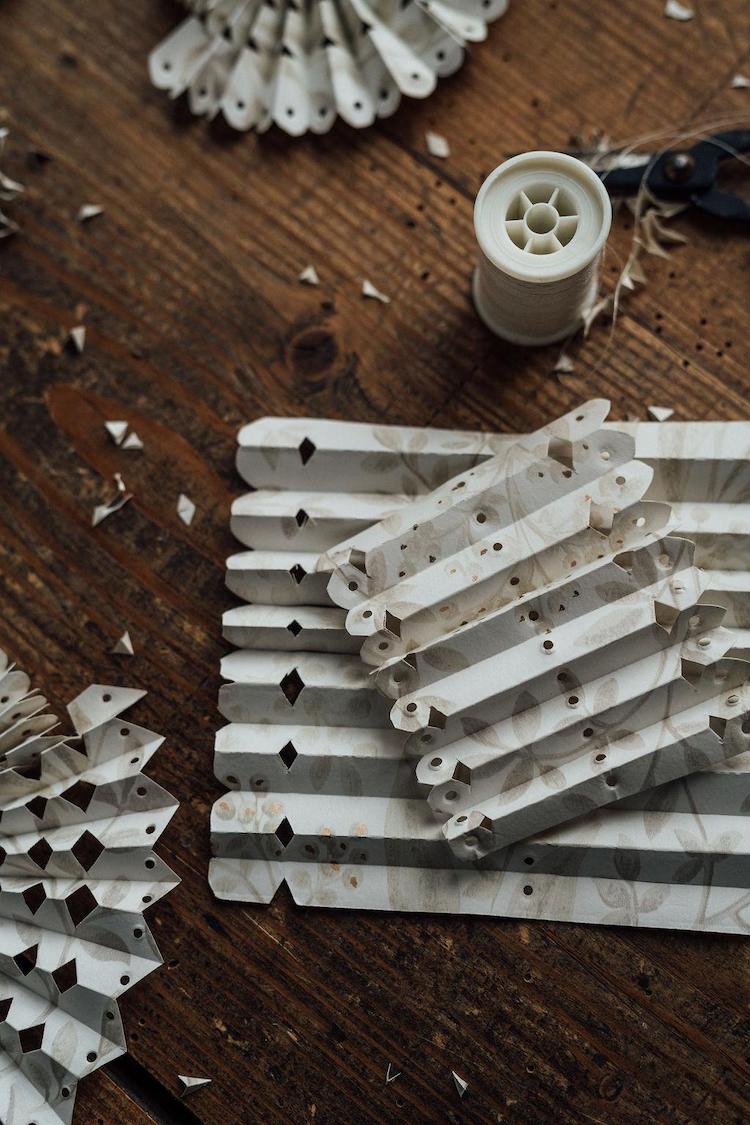
2. Fold each section into a concertina shape - starting at the shorter end, with each fold around 1 cm in width. 

3. Shape the ends of the folds with scissors (creating rounded ends, points or hearts) or use the hole punch to create a pattern. 

4. Fold your concertina paper in half and make a hole through the middle, cutting through all the layers. 

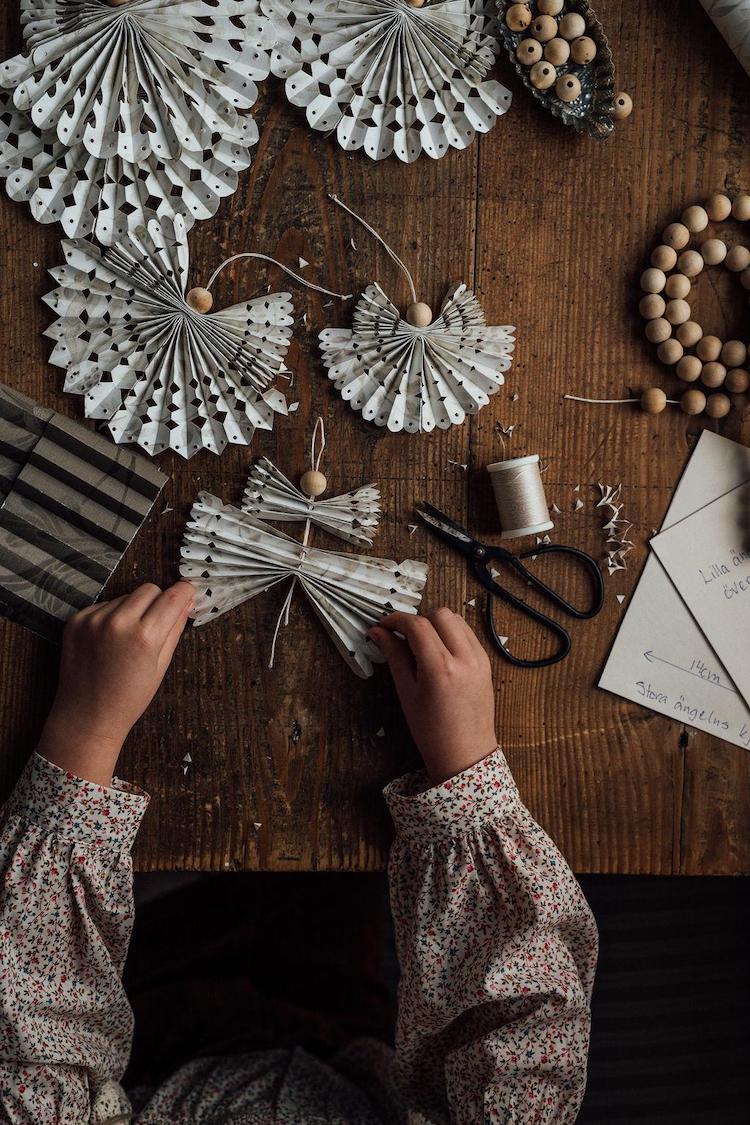
5. Glue the wings (the smaller section) to the skirts (the larger section) 

6. Use the needle to guide the string the entire way through the holes in the skirt and wings and tie a knot at the bottom so that it stays in place. 

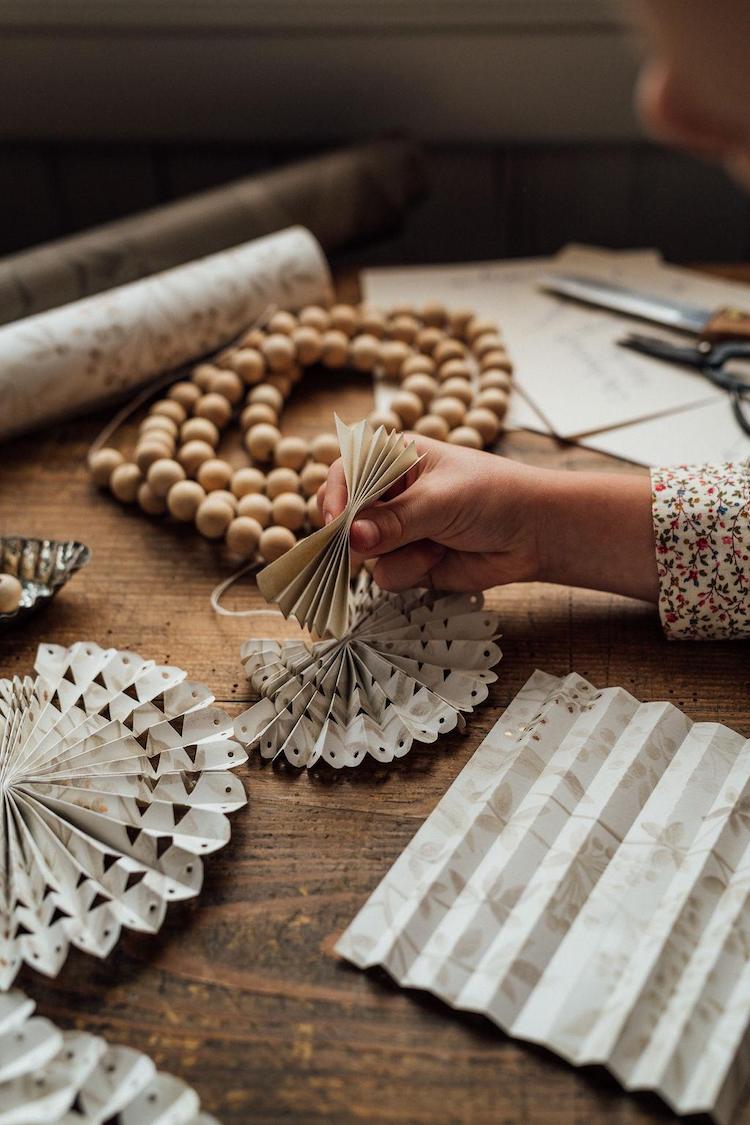
7. Thread the bead onto the string above the wings, pull it tight and then glue the bead to the wings. Knot the string at the top, leaving a fairly large loop with which to hang your angel. 

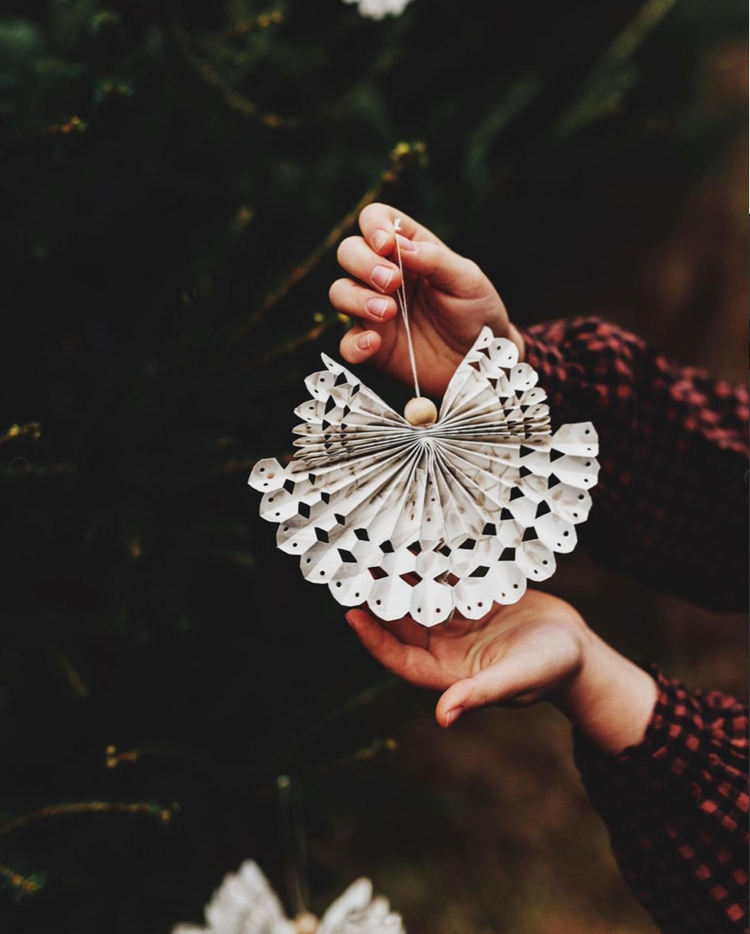
8. Unfold the skirt and glue the inner edges to one another to form a skirt. 

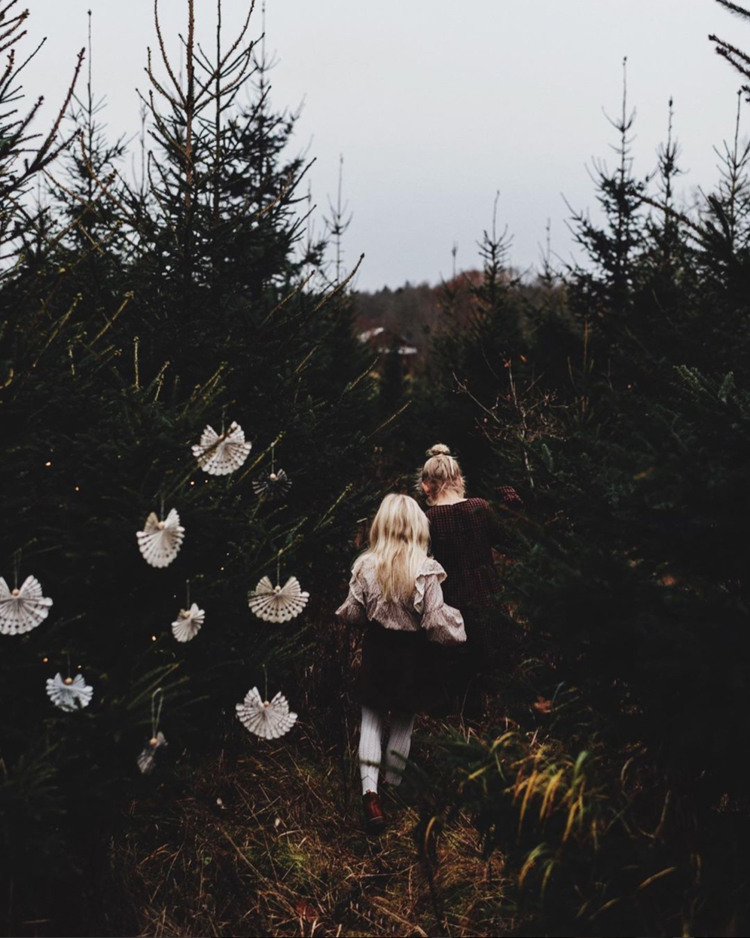
And that's it! You have your choir of angels! 

I hope you have a fun time making these! See more pictures and instructions over at Böråstapeter

Looking for other DIY Christmas decoration ideas? How about: 


Wishing you all a great start to December - it's snowing here which tells me it's going to be a cold one but a fun one! 

Niki

Photography Malin Mörner shared with kind permission

Twitter FaceBook

Pin It
3

One Swedish Apartment, Two IKEA hacks!

Hejsan! One thing I've learned over the years, is never walk around a flea market (or IKEA for that matter) and see everything at face value. Instead, see it for its potential! Love the shape of a cabinet but not sure about the wood? Paint it. Love the legs of a table but dislike the top? Change it. There is SO much you can do! Just look at the bed in the home of Hanna Söderström. Hanna loved the shape of a second-hand bed frame but wasn't keen on the heavy, dark wood, so she painted it in a wonderful grey to blend in with the walls - and it gave the piece a whole new lease of life in the process! 

For a more simple approach, take the IVAR cabinet from IKEA. It's become one of the most hacked items in the collection, and you rarely see a Swedish home without it. In this lovely open-plan Gothenburg apartment, it pops up twice, can you see where? Enjoy the tour, there are plenty of other ideas to steal too! 

I love the layout of this open-plan living space - it has a zone for everything! Pay special attention to the lamps too, which include the Formakami pendant* and Panthella table lamp* - both fabulous! 

It's amazing what a single branch from the garden / surrounding area can do for a space - plus it's free!

Styling tip: it's hard to find really tall indoor plants without paying through the roof. Place larger plants on stools to give the illusion of height and keep it from marking the floor (at least, until you've lovingly nurtured it to grow to the ceiling!). This teak round stool* is similar.  

IKEA IVAR cabinet hack number one: the exterior has been painted in a fab salmon pink to add a touch of colour to the children's bedroom. The shade also helps to tie the bedroom in with the hallway. It's also been given new legs (available from companies such as Pretty Pegs). 

IVAR cabinet hack number two: in the hallway the same cabinet has been adapted with a ribbed front and new pine legs. If you're a bit of a dab hand, you can easily recreate this look with wood from your local DIY store. If not, try companies such as Superfront - who make cabinet doors, handles, knobs and legs for IKEA furniture. 

Sidenote: I updated an IVAR cabinet in Liv's room. Note that it was originally designed to be wall mounted and can be unsteady when you attach legs so make sure you fasten it to the wall to avoid injury to yourselves and objects! 

Styling tip: Sometimes hallways are just too narrow / small to add a load of furniture and can feel a bit bare if painted one shade. Wallpaper like this one, helps to add interest without cluttering up the space. 

Do you like to hack furniture? If so, please do share your tips / favourite hacks in the comment section and inspire us! 

I loved hearing the debate on wrinkled / non-wrinkled bedding in the comment section on Friday! What are your thoughts on this? 

I'm about to shoot off to photograph a beautiful autumn piece in my sitting room (keep an eye on instagram tomorrow to see what it is!) - but before I leave, here are a couple of other homes you might like: 


Vi ses imorgon! 

Niki

This home is for sale via Alvhem. Photography: Henrik Linden, Styling: Grey Deco Interiors

Twitter FaceBook

Pin It
2

Simple DIY: My Narrow Hallway Update


Do you have any pieces lying around that you haven't got round to putting up on the wall / fixing? I was gifted this beautiful Arles mirror by Made.com around a year ago. I originally ordered it for our landing but for some reason it didn't quite work - so it's been waiting for a new home ever since. And then the other day I had a lightbulb moment. Now, our house might have many great features, but the hallway is not one of them; it's fairly dark, has lots of doors and like Piccadilly Circus when all five of us are home (it doesn't help that our kids don't seem to have mastered the art of hanging up their coats). I have to admit, we haven't done anything to it since we moved in - until now! 


The hallway feeds into the kitchen (see above) and sitting room (last picture) and has a few in-built cupboards - which I've often contemplated painting (thoughts?). 

This wall has always been blank. I painted it in a Farrow & Ball shade many moons ago (could it be Down Pipe? I can't remember now!). I still love the colour, but it needed something more! 

And here's where the mirror came into the picture! Here's a step by step guide of my DIY project: 

1. The Arles mirror in brass is really heavy (tip: always check the weight of a mirror before you order it as some can be incredibly heavy - especially if the wall you'd like to put on is not that strong). I wanted to make sure it was hung in the right place from the start (I've made plenty of mistakes in the past!). I marked out the centre of the wall and made sure it was at eye height (the lower edge is 117 cm from the floor). 

2. I measured out exactly where I wanted the hooks to go beforehand, ensuring they were centred and also a good height from the floor for bags and jackets (102 cm from the underside of the rack to the floor). I also used a spirit level to ensure it was straight. 

The wooden pegs are from a local store - this coat rack* is similar. I've had this Ryobi drill for years and use it all the time - it's way more fun (and less work) than a manual screwdriver!  

3. And then all that was required was a good polish! 


I have to say the mirror instantly lit up the narrow space and together with the hooks, makes better use of the space. It's also handy to have a mirror near the entrance and extra hooks. 

The framed 'Twined 02' print is by Copenhagen-based design studio Moe Made It. And just peeping into the picture is a rubber plant, which Per calls 'Farfar' (Grandad) - since he inherited it from him just before he died over thirty years ago. Everyone in his family has a cutting - such a lovely way to remember someone! 

It's just a simple DIY but I thought I'd share it all the same - you never know, you might just have some empty wall space waiting for some TLC, in which case, I hope this inspires you.

I wonder how long our hallway will stay this tidy? I give it 5 minutes!! Oh well, life is designed to be a little messy, and it's a real sign of summer when balls, scooters, swim stuff and whatever else start to appear! 

Next stop, a new light - I haven't decided which yet, tips welcome! 

So, Friends, that's it from me this week. I hope you have a wonderful couple of days, see you Monday.

Trevlig helg! 

Niki

*this post includes affiliate links

Twitter FaceBook

Pin It
15

5 Clever IKEA Hacks to Steal From a Danish Home

You might recall the name Puk Munch Sjeldan from my feature about a tiny Copenhagen apartment that's big on handmade design a while back. That apartment is now occupied by her daughter Luna, so the Dane has turned her hand to her own home - transforming it room by room into a wonderful living space. Dating back to 1904, and located in the suburbs of the Danish capital, the family home is full of fun, quirky pieces, pops of colour as well as books and art. But it's Puk's IKEA hacks that really caught my eye! Here are five ideas to feel inspired by: 

1. Designer Table
Puk added a 90 cm x 190 cm sheet of plywood (painted white) over an existing GÖRAN table using angled metal brackets to transform a budget fold-away piece into a sturdy designer table! 


I couldn't see any hacks in the sitting room area - but knowing Puk there are no doubt some lurking somewhere. I couldn't resist sharing a couple of pictures all the same, as it's so unique! Love the blue 'bold stool' by Moustache in particular, how about you?

2. PAX wardrobe with customised doors
A friend of mine pointed out that the issue with IKEA wardrobe doors is that they never extend all the way to the floor (which would give them a much cleaner look). Puk solved this by adding her own, longer ones, using plywood cut with a circular saw (you can also ask your DIY store to do this for you). She matched the holes with the original PAX wardrobe doors so that she could reuse the hinges. See more details about the hack here

It may not be an IKEA hack - but I can't tell you how important it is for your neck and back to ensure your screen is at the right height when you're working from home. I love how Puk has used a stack of books to give her laptop a lift! 

3. Striped stool 
Puk took 30 minutes to transform a little FROSTA stool into a designer seat using a layer of foam / polyester batting, fabric and a staple gun! See all the steps in her Instagram 'DIY' highlights on instagram if you'd like to know more.  


4. Bed with storage
Puk and her beau used the IVAR 3-drawer dresser to create a bed with oodles of built-in storage. Looking at the DIY steps in her Instagram highlights (you can also find a tutorial on YouTube here), it's one for the more hardcore DIYers among us, but it's fun to know it's possible with a little work! 

No DIY hack to be seen here in the bathroom (that I know of), but it's always nice to share more of someone's home for inspiration! 

5. Hallway storage
I spy a set of four MOPPE storage chests mounted on the wall to create a larger storage unit that's also slim enough for narrow spaces. Perfect for all those bits and bobs like keys, wallets etc! You could also paint them to match your walls so they really blend in. 

Did any of these DIY IKEA hacks catch your eye? 

I love the table - GÖRAN is only around 40 euros and a piece of PLYWOOD / MDF is also very budget friendly. Such a great idea! 

You can see more of Puk's home and discover more IKEA hacks / DIY ideas over on her instagram

Feeling creative? Here are a few other ideas: 


Vi ses imorgon! 

Niki

Photography: Puk Munch Sjeldan

Twitter FaceBook

Pin It
7

Weekend DIY: Simple Twisted Candle Hack!


Sculptural candles in sweet pastels: one of the biggest micro trends to hit Scandinavia right now. And guess what? They're actually not that tricky to make! Just to be clear I'm not talking making the entire candle from scratch - I know we're all spending copious amounts of time at home right now, but that could be a push (although I'd love to see the results if you do!). I'm talking giving ready made candles a funky twist that will make our Danish friends proud! 

Curious to try it this weekend? This film by the swedish queen of DIY Malin Poppy Darcy Mörner tells you everything you need to know! Can't access Instagram? There's another great tutorial on Youtube with more detailed instructions. 

No time for DIY / arts and crafts? I hear you! Here are some of my favourite sculptural candles right now - the only problem is, they're way to pretty to go up in smoke!  


Candle sculptures that will put a smile on your face - no holder required! He has also made some fabulous pillar ones in collaboration with Hay. 

This Danish store sells pastel, sugar-coated-style candles that look good enough to eat (although I probably wouldn't!). 

Funky blob-shaped 'Goobers' (guys) that add a little pastel-shaped fun to the home. 

What do you reckon? Are you willing to give the twisting a go? Or perhaps another candle caught your eye? Either way, if this trend is anything to go by, it's totally time to up the candle game! 

Have a wonderful weekend friends! 

Niki

Film shared with kind permission from Malin Poppy Darcy Mörner. 

Twitter FaceBook

Pin It
8

This Year's DIY Christmas Decoration (Made From Toilet Paper Rolls!)

If ever there was a DIY Christmas decoration of the year, this would be it! All you need is a toilet roll - and we all have A LOT of those! 

Read on to find out how to put your toilet paper rolls to good use and make the prettiest of Christmas decorations-

How to create a Christmas flower from toilet paper roll: 

What you need:
- 3 toilet rolls
- Ruler
- Pencil
- Scissors
- Glue gun
- String

What to do: 
1. Flatten one of the toilet rolls so that there is a fold on each side
2. Use the ruler and pencil to draw horizontal lines 1 centimetre apart.
3. Follow the lines to cut 1-centimetre strips (creating a series of loops)
3. Arrange the loops into a flower shape to form the centre of the flower and glue the tips together 
4. Flatten another toilet roll and repeat step 2. And then cut the strips in half horizontally and use the glue to create smaller loops. Attach these to the flower using glue
5. Flatten a third toilet roll and repeat step 2. Cut the loop open to create an arch and then attach these to the flower with glue. 
6. Add string to hang your decoration


There is no end to the creations you can make with toilet rolls - I also love the angels above, and have also seen stars and snowflakes, as well as a load of other shapes! 

Got quite a toilet paper roll hoard at home? Here are a few tutorials to get you started: 


And one for the kids: 


Will you be making one of these this Christmas? 

Niki

Photography: Thank you so much to Frida Ramstedt of Trendenser for allowing me to share these lovely pictures. Frida is the author of The Interior Design Handbook - in which she divulges the secrets of successful Scandinavian interior design. 

Twitter FaceBook

Pin It
2

5 DIY Projects to Try During Quarantine

I wish I could say that I'm an absolute whiz at power tools or a sewing machine, but to be honest, I am a reluctant DIYer. A lot of the DIY or craft projects I find look a little too homespun for my liking, or the effort required to make it look like the real deal is overwhelmingly tedious or calls for carpentry skills I just don't have. But this quarantine has me wanting to spruce up my home in a more resourceful, hands-on way, so I've rounded up five DIY projects for you that are simple, can be mostly done indoors (with the exception of sanding!) and actually look more high-end than you'd expect.

1. Plant Propagation Wall
This delightful wall of plant cuttings DIY is brought to you by Christine Higgs of @forthehome. It's the perfect project for those who've had extra time to mist, primp, sing to and propagate all your plant babies during this quarantine. 

Christine Higgs / @forthehome


2. Textured art
Here's another DIY from the very resourceful and productive Christine, who created some beautiful, dimensional pieces for her home with acrylic paint and modeling paste. She's got a video tutorial on her IGTV if you'd like to check it out! It's the perfect addition to a bare wall or corner that just needs the subtlest touch of texture that won't compete with its surroundings. 


Christine Higgs / @forthehome

Christine Higgs / @forthehome


3. Wireless Pleated Lamp
This is more of a hack than a DIY, but it's still very satisfying to the lazy DIYer! I've been wanting the right ceramic base for a pleated lampshade I found online and for now, settled on a ceramic vase I already owned. But since the lamp shops are closed, and I don't feel like drilling into the bottom of my vase (risky!) and wiring it myself, I was inspired by Lisa Danielle Smith to simply plunk the shade on top of the vase and call it good. But if you'd actually like a functional lamp rather than a decorative statement, there are also plenty of wireless bulb options, such as LED lights controlled by remote control that you can jimmy rig into the vase. Thanks, Janae for that last tip!


Lisa Danielle Smith


4. Trash to Terracotta
When Geneva Vanderzeil found a can of liquid terracotta at her local hardware store, she tried to find as many applications for it as possible. One of her projects was taking a motley bunch of thrift store vases and turning them into some of the lovely terracotta pieces you see here. While this specific liquid terracotta product isn't available everywhere, she's created a DIY chalk paint recipe to give you a similar, textured ceramic look. You can also check out the hashtag #trashtoterracotta on Instagram to see all the people who've been following her lead! 

Before


After
Geneva Vavanderzeil / DIY tutorial


This handy little tool can work wonders on old wooden furniture and decor items with a less than desirable stain (or paint job). If you're looking for a light, neutral, raw-looking finish, you might be surprised at the wood that could be lurking under a shiny, orange-hued layer of lacquer or a dark, mahogany stain. And if you do uncover a beautifully rustic and antiqued wood underneath but still want a protective top coat, I recommend using a water-based, matte polyurethane as it'll still look more raw plus the water-based poly's are less prone to yellowing than oil-based! Cynthia Harper is someone who is constantly making use of her orbital sander and going to town on anything from coffee tables to cheap, wooden bowls from her local thrift store that end up looking like chic, weathered, farmhouse bowls rather than .99 cent castaways. 


Cynthia Harper / Orbital Sander


It's been so fun to share these ideas with you. I hope you've discovered a DIY project you'd like to replicate in your own home! Are there any that stand out in particular?

It's a public holiday in Sweden today and Niki will be back on Sunday. She sends a 'stor kram' (big hug!).

Wishing you all a wonderful weekend!

Ezz

Ezz Wilson is an interior and photo stylist and holistic home consultant based in Portland Oregon. You can find her over on instagram here

First picture by Christina Higgs / @forthehome

Twitter FaceBook

Pin It
3

Subscribe To My Scandinavian Home

Subscribe to My Scandinavian Home

skovby ad


site by ANAAR

This website uses cookies to ensure you get the best experience on our website.
MORE INFO