Scrolling

Before and After Vintage Wall Shelf Makeover

Thank you so much for all your lovely comments about our summer cottage master bedroom makeover on Wednesday. Per and I are so happy you like the update as much as we do! 

As promised, here is a post about how I transformed the pine wall bracket.

This wall shelf has been hanging on the bedroom wall in the summer cottage for many years (long before I arrived on the scene!). Needless to say, it belongs here! But the varnish on the pine had yellowed with age and while we all love the shape, the outdated look wasn't quite in keeping with the calm style we had envisioned for the newly revamped room. 

Caveat: I am not quite sure why there's an old mattress leaning against the wall in this picture obscuring the view - but I hope you get the gist as it's the only shot I have! 

So, we took it off the wall and I carried it to my studio where I scrubbed it down with soap and water (an important step!). 

I selected Tidlös paint by Jotun Lady to match the Sandberg wallpaper (the great thing about this paint is that I didn't need to sand down the wood first - but if you are looking to carry out a similar project on a wooden item, it's important to check the requirements first).  

I applied two layers of paint using two different paint brush sizes - one fairly small (featured) and the other very small (the knobs on the drawers were so fiddly!). Afterwards, I lightly sanded the edges of the drawers to ensure they slotted back into place and could be pulled in and out freely. I've learnt this from my childhood home - I had an antique chest-of-drawers in my bedroom and would need to wiggle the drawer for about 20 minutes just to get to my socks, it used to drive me insane! 

Once the paint had dried, we hung it back on the wall using a spirit-level app on the phone (have you tried these types of apps? so handy!). 

Aside from drying time, the entire process took about 2 hours. 

And hey presto! A brand new shelf! 


I hope you like the results and feeling inspired to revamp something unloved too. 

Who knows, perhaps you'll be looking at that piece at home that you were thinking about chucking out with new eyes now? Or maybe you'll discover a tired looking item of furniture in a loppis (flea market) that no one wants this weekend and give it a fabulous revamp? If you do, I'd love to see the pictures! 

Happy Friday friends! 

Niki

Twitter FaceBook

Pin It
9

Anna and Martin's Tiny Handbuilt Cottage Floating on a Swedish Lake

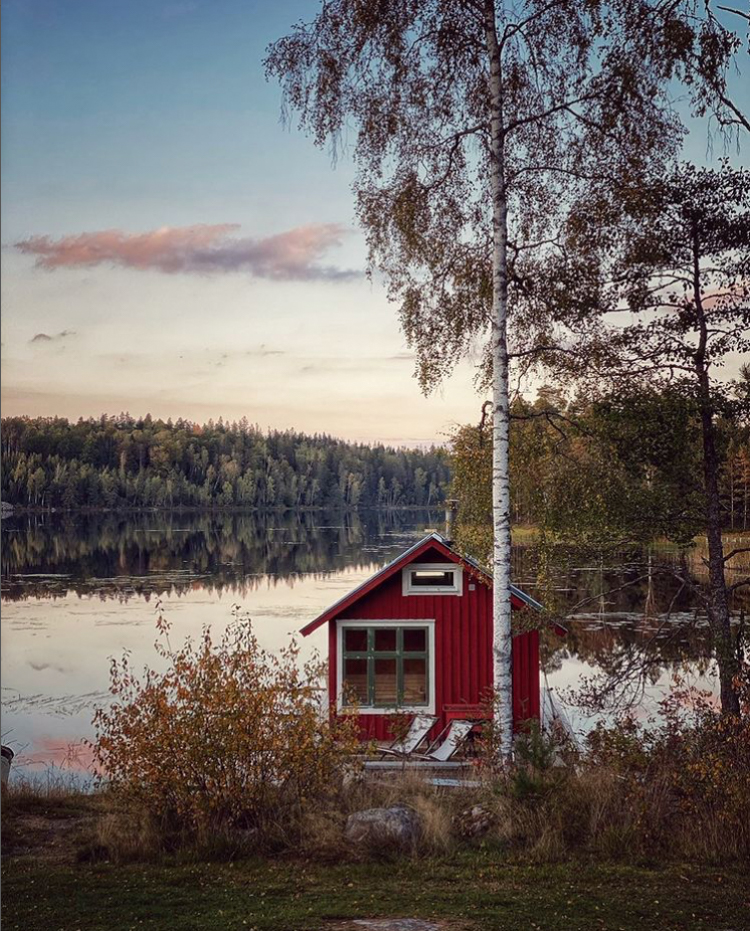
"I've never tried that before, so I'm sure I'll manage it" - so said Pippi Longstocking, and these are the words Swedish florist Anna Starrén and her husband Martin live by. Martin had always dreamed of building a floating cottage from which to explore the lake beside their country home. And when his friend passed away, he put all his effort into turning his dream into a reality. Read on to discover more! 


The starting point was to build a floating pontoon (measuring 5 x 10 metres), upon which the little red and white cottage (measuring 4 x 3.5 metres) was built.  The pontoon is attached to the mainland using a series of mooring lines. 

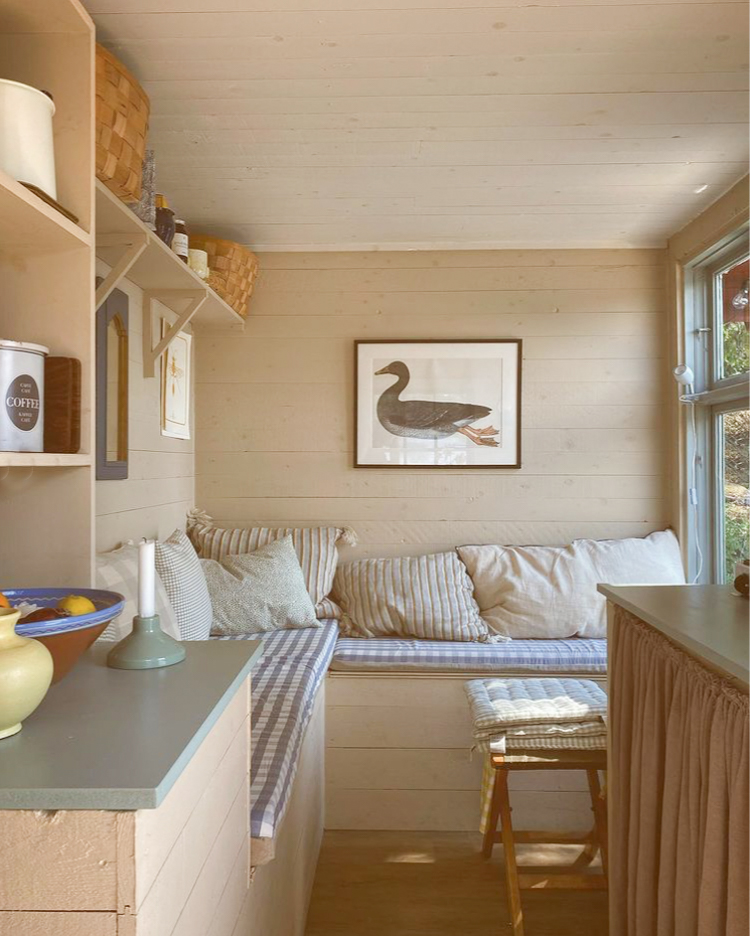
The house has everything you might need for a relaxing day by the lake including a sleep loft, sauna, isolated floor, wifi, fridge, gas stove, shower, water converter, shower, dry loo, binoculars, bird book, ceramics for 10!, a coffee maker and an anchor! 

Oil lamps are dotted around the little cottage, providing light and heat. The cottage is also powered by 2 x 160 solar panels and a 3x 90 amp battery. 

The kitchen, sofa and ladder have all been hand built to fit the space. 

Anna says: "building this house is one of the best things we've ever done, it's become our year-round refuge."

Come winter, the lake freezes over and the little cottage becomes a perfect spot for ice bathing. 


A whole is cut into the ice so that they can still take a dip after a sauna. 

BRRRRR! 

Could you imagine winter bathing like this? 

If you're ever in Sweden during winter, you must try it - it's such a crazy yet wonderful experience (especially afterwards once you're all wrapped up warm again and nursing a mug off glögg!). Studies have shown it has numerous health benefits! 

See Anna's inspiring instagram feed @starrensannan for more pictures of the floating cottage, as well as their main house. You might also like to stop by Anna's homepage for more information about her work as a florist and upcoming workshops (how I'd love to do one of those - I wonder if she holds any at the floating cottage?). 

Would you like to see a few other unusual properties today? 


Happy lillördag! 

Niki

Photography courtesy of Anna Starrén with thanks 

Twitter FaceBook

Pin It
7

How a Vintage Cigar Cabinet Became Perfect Home Storage


I was so intrigued by the incredible vintage cabinet in Jana Roach's home yesterday that I had to dig deeper. Where did they find it? And most importantly, how did they manage to find the exact size piece required for the space? Read on to discover that not all is always as it seems... and sometimes it takes a whole load of imagination and some hard work to make the vintage piece you fall in love with fit your home! 

The original piece: 
Jana and her husband Tanner were in a second-hand building materials store in Seattle, US in March 2019 when they came across this old cigar display. 

They immediately fell in love with it, but the unit was way too big for the space they had - plus the slanted shelves (originally used for displaying cigars) were far from practical for kitchen storage. 

Many would have been deterred, admired its beauty and walked on. But not Tanner and Jana

The space
They could see its potential as a cabinet for their new dining room. The unit and the space just needed some work! 

What they did
Since the cabinet had no back, they prepped the back wall with white subway tiles. They opted for white grouting so that it wouldn't take over from the items in the cabinet. 

The cabinet was then modified to fit the space. This meant cutting off one of the bays, raising it by around 6 inches and adding a crown trim, base and side. The shelves were also levelled. 

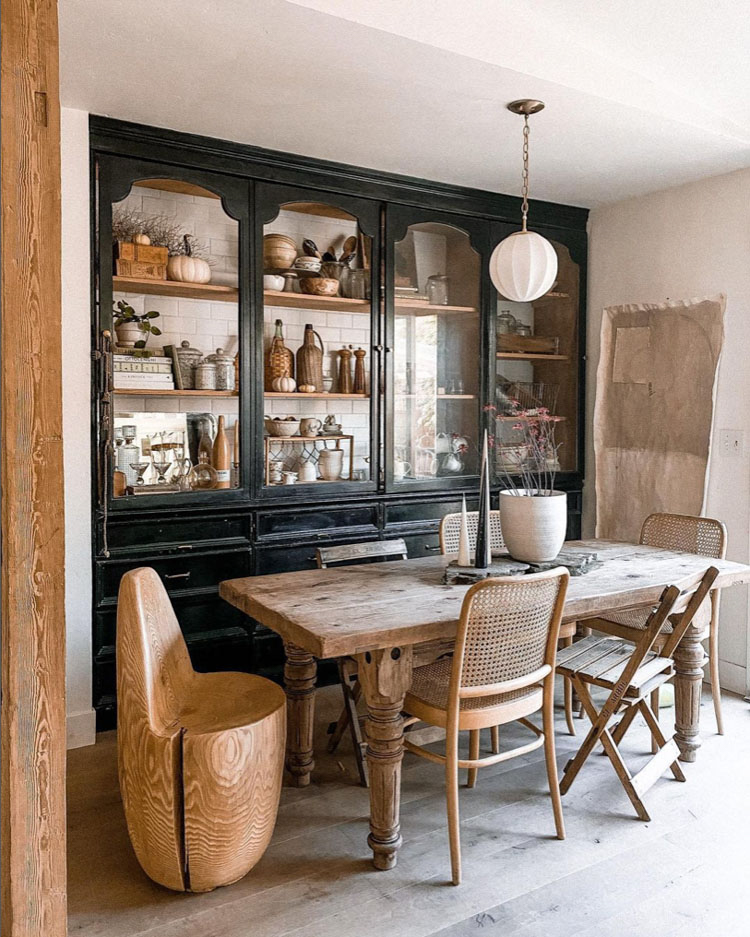
The result:


I love this transformation! 

Looking at some of these homes, it can appear that everything has just effortlessly fallen into place, but it's not always the case - often there's a whole level of imagination and hard graft involved! 

Jana always recommends taking a tape measure to flea markets and reclaim yards. You never know - you might just stumble across a piece you love, and even if it's not quite right in terms of size or colour you might just be able to adapt it for your home and give it an entirely new lease of life anyway! 

Have you up cycled / renovated any second-hand pieces in your home? If so, I'd love to hear about them! 

Niki

PS I don't usually publish posts on Friday, but tomorrow will be an exception - and it's dedicated to anyone who has been wondering whether or not to install a woodturning stove! 

Photos courtesy of Jana Roach, shared with kind permission.

Twitter FaceBook

Pin It
2

10 Scandinavian Christmas Crafting Ideas (Many are Edible!)


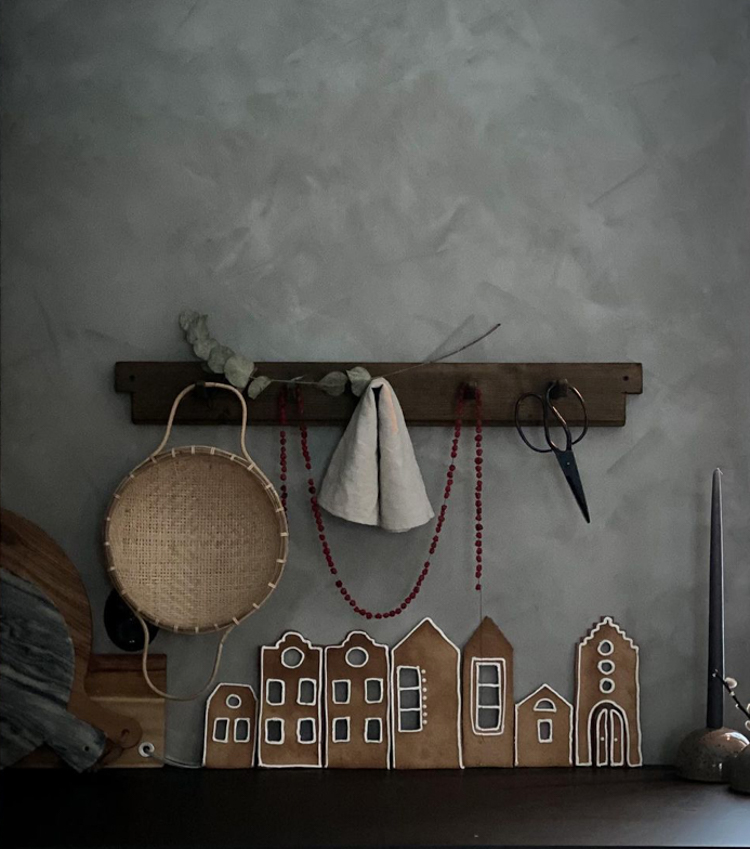
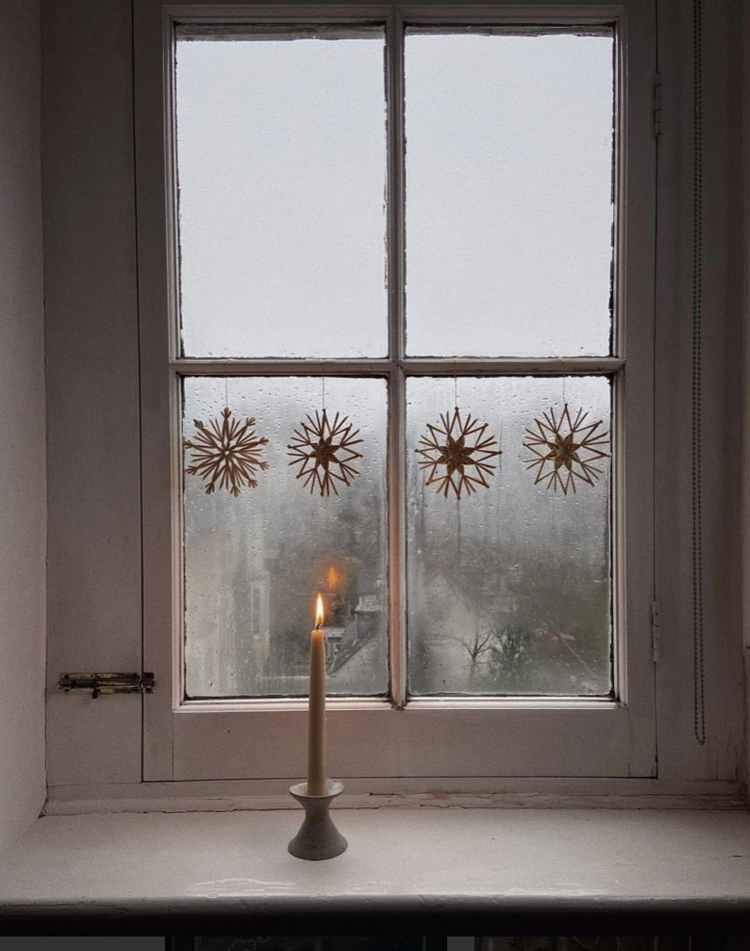
If there's one thing I really admire about the Scandinavians, it's their passion for crafting and DIY. And at Christmas there's no stopping our dexterous Nordic friends. Referred to as 'Julpyssel' adults and children across the country are busy rolling out gingerbread dough, perfecting their Christmas caramel, carving out paper snowflakes to hang in the window and finalising candle holders with moss. If you'd like to channel your inner Scandinavian and get crafting this week, here are 10 Christmas DIY ideas to get you started: 

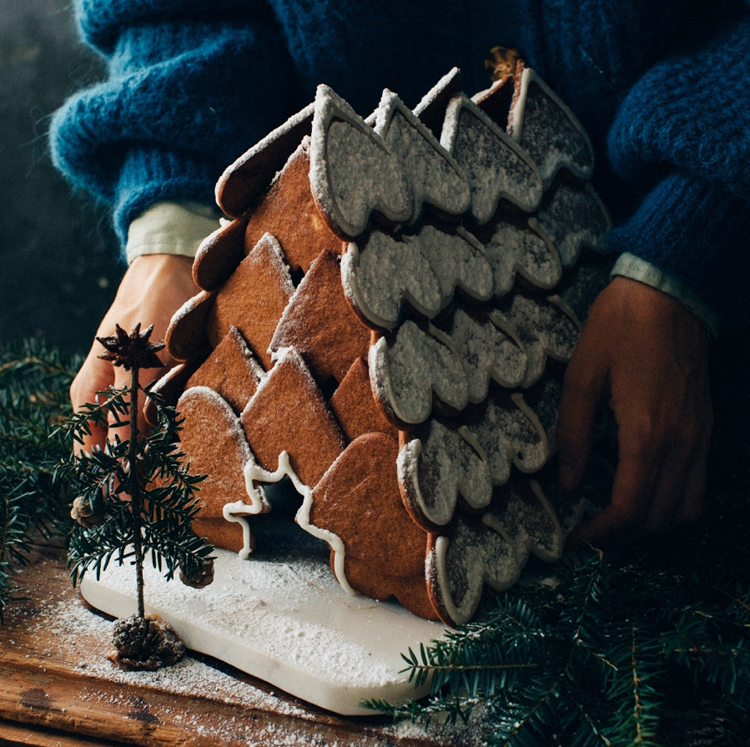
1. A-Frame Gingerbread house: a favourite in Sweden, edible gingerbread houses look so pretty at Christmas. If you're a novice, it might be best to start with a kit (they sell them at IKEA!), but I also love this fab A-frame cabin made from heart shaped gingerbread!  


2. Mini gingerbread houses: These pretty houses can be hung in the window or on the tree (they might also get eaten on the way - and who'd blame you!). Instructions / recipe here


3. The gingerbread village: Why create individual houses, when you can make an entire village? There's so much fun to be had creating a skyline, and you can eat it afterwards too. 


4. Mini gingerbread drink decorations: Imagine serving hot chocolate with this little touch - hygge personified! Instructions  here


5. Julkola (Christmas caramel): Who doesn't love homemade sweets at Christmas? Caramel makes a perfect addition to the table too - or wrapped as a present. Original recipe here (in Swedish), English recipe here

Dörte Janusxzewski / @lewesmap

6. DIY snowflakes made from cardboard: These pretty decorations made from loo roll cartridges (or straw, toothpicks, newspaper - just about anything!) look just as pretty on the tree as they do hung in the window! Instructions here. 


7. Window drawings: Looking a little grey outside? Why not grab a white pen and create a pretty Christmas display to brighten up your view? 


8. Paper flowers: Colourful crepe is a perfect material for making pretty paper flowers. Place them on mini trees, in a bowl or create a garland. Know-how here. 


9. DIY Forest friends wrapping: put a smile on your children's faces with these cute forest friend Christmas wrapping ideas! 


10. Candle displays: Small plant pots make a perfect candleholder at Christmas time. Simply fill them with soil, a little moss and some small branches from a fir tree. 

So many great ideas here. Can you imagine making any of these? 

What do you make at Christmas? Inspire us in the comment section below! 

More Christmas DIY ideas here: 


Have a great start to the week!

Niki

Twitter FaceBook

Pin It
5

A New Wall Colour In My Bedroom / How To Create a Textured Wall

Good morning friends, how was your weekend? Per and I have been busy painting our bedroom. Don't get me wrong, the 'blushing peach' (above) was really cosy, but with the impending (whisper it) autumn and darker days on their way (shudder!), we were keen to give it a fresh, light feel. In the past few years I've been really into lime paint and the beautiful matt nuanced / textured affect it creates. I've painted quite a few walls in my home already with this, but it occurred to me to share a little more about the process this time round- just in case you're tempted to do something similar in your home!

There's a bunch of great lime-based powder form paints out there. My go-to is Icelandic brand Kalklitir - (I've used it before in the kitchen and they kindly gifted this batch - thank you Audur!). We chose the shade 'Palladio' which is fairly light and I noticed, the same one Jacqueline Mikuta used in her apartment which I featured recently. It has a wonderful, calming aesthetic. 

How to apply it
Before you apply it, the trick is to think carefully about how nuanced / cloudy you would like your wall. Lighter colours will automatically show less affect. 

We used 1.7 litres of water for 1 kg of powder (although this varies depending on which brand you use) and applied it evenly using fairly straight / curved strokes for a relatively 'clean', subtle look. 

However, if you're looking for a more textured aesthetic, you can add more water and apply it fairly roughly, using a cross action (which we did on the final layer) - adding more in some areas than others. Or for a REALLY textured wall you can work the powder into a paste and apply it with a spatula.

Bear in mind that every wall is different and some have better absorption than others - so results will vary no matter what! 


Is it easy to apply?
When I shared the picture above on instagram I got asked a lot of questions about whether or not this type of paint is easy to apply. Firstly, I always think that when you see renovations online they always look so effortless. It's as if they appear by magic!!! But with any decorating there's always a lot of work involved - checking samples, taping adjacent walls and windows, removing appliances, cleaning the wall etc. 

However, once you get started applying chalk paint is really quick and easy with a brush - in fact I would say, it's way quicker than standard paint. But it can be very disconcerting the first time you use it as it feels like it's never going to cover whatever was underneath and looks SUPER patchy while it dries! Fear not though, it'll quickly settle and the coverage is great (we used three layers, but probably could have got away with two). 

On the other hand, applying it with a spatula is way more labour intensive - but no doubt worth it if that's the look you're going for! 

If you're using Kalklitir, there's more info about the application process here

How many layers do you need?
This always depends on the wall in question. I was slightly concerned as one of the walls in our bedroom (behind the office) is really dark - but since it had a matt (or semi-matt) finish we were able to apply the paint straight over it without any prep work. We ended up using three layers in total, allowing each layer to dry thoroughly in between.

Ready to see the result? Ta-daaaa:

As you can see, the texture is really subtle, but you can still see shifts in the colour which helps to add depth and interest the space. 

We're so happy with the result - I hope you like it as much as we do! If you have any questions about the paint please do give me a shout below and I'll do my best to help!

I'm so looking forward to sharing more pictures and info about our bedroom soon.

Have a great start to the week!

Niki 

Final image taken by me and styled by Helen Sturesson

Twitter FaceBook

Pin It
10

Back Again! (Plus Our Summer Cottage kitchen Renovation)

Why hello there! I hope you've had a wonderful couple of weeks. Per, the girls and I have just arrived back home to Malmö with a bump after a couple of weeks up at the cottage. How I miss that place, we had such a magical time. I might just have to go back up with the specific aim to write a guide - I have so many tips to share with you in case you're ever on the beautiful 'Bjärehalvön' in Northwest Skåne! It's an area not to be missed if you're visiting Sweden! It would also give me the perfect excuse to return! I also spent a little time thinking about the tiny cabin we're building this autumn in the cottage garden and so looking forward to sharing more of our plans with you later this week (thank you for so much for sharing your thoughts on the windows and windows and doors, I can't tell you how helpful it was!).

In the meantime, here's a throwback to the time Per and I renovated and installed the cottage kitchen by hand. It was a true labour of love - and I appreciate it all the more as a result! Thank you so much to Christina AKA 'Farmor' for entrusting us with your kitchen! 

We stripped out the 1970s kitchen - which included a plastic Lino floor, before sanding, plastering and painting the space. Best find: a perfect size mouse hole under the kitchen counters. We'd been wondering how they were getting in! 

Per was in charge (he's a bit of a dab hand when it comes to DIY), and I was his 'sous chef'. It was really hard work, but surprisingly therapeutic! And for once, I was actually quite good at taking instructions from him! 

One of my jobs was to put together all the IKEA kitchen cabinets. If there's one thing I've learnt, it's to follow the instructions by the letter and never miss a step! By the end, I never wanted to see a flat pack ever again! 

Installing the cabinets was the trickiest part of all - and required help from YouTube and multiple calls to the IKEA help line (it was surprisingly easy to get hold of someone!). The main issue was that they have to be exactly in line - no easy feat when you're working with crooked walls from 1936! But we got there in the end! 

You can read about all the details in my final reveal post here

Other than the tiny cabin, I'd really love to renovate the girl's bedroom up there. Although now that I know how much work even the smallest room can entail, I'm dragging my feet a little. 

Have you carried out any renovations recently? Or perhaps you're about to embark on one? I'd love to hear more about it below! 

Now that I'm back, I'm so looking forward to posting regularly again. As always, I'll be posting every other day until the girls go back to school - and then daily from 1st September.  Thank you for stopping by! 

Niki

Twitter FaceBook

Pin It
6

Subscribe To My Scandinavian Home

Subscribe to My Scandinavian Home

skovby ad


site by ANAAR

This website uses cookies to ensure you get the best experience on our website.
MORE INFO