Scrolling

Scandinavian Design Icons: CH07 Shell Chair

Sponsored by Carl Hansen & Søn, with thanks

One of the things I appreciate most about good Scandinavian design, is the dedication to making furniture that is both practical and aesthetic. Combine this with high quality natural materials and a timeless appeal and you have a masterpiece on your hands that can be loved for generations to come. 

Danish furniture designer Hans J.Wegner was one of the distinguished designers of all, and helped to put Danish design on the world map. His work is widely recognised for its organic functionality and with items such as the Wishbone chair, CH25 Lounge Chair and Elbow Chair part of his portfolio, it's little wonder he's known as the 'King of Chairs'! 

Today I'd like to pay homage to one of his finest designs: the iconic CH07 Shell Chair

The three-legged chair was designed in 1963, but despite positive reviews for it's avante-garde look and feel, it was only when Carl Hansen & Søn reintroduced the Shell Chair in 1998 that the general public appreciated its distinct expression. Twenty-five years on it's one of the most well-loved, iconic chairs of our time!  

The Shell chair is instantly recognised by it's wing-like seat and curved backrest which is supported by three arched legs. Its testimony to Wegner's mission to ensure a chair should be beautiful from every angle. 


The chair has been around for sixty years, and to celebrate the occasion Carl Hansen & Søn have launched this 60th anniversary edition of the Shell Chair in rosewood and oak (with the option of adding seat cushions) - available until December 31st 2023. A small brass plate with Hans J.Wegner's signature can be seen back making it a true collector's item! 

Imagine having a piece like this in your home? I've certainly loved looking after this masterpiece in our sitting room these past few days (sadly it's only on loan!). 

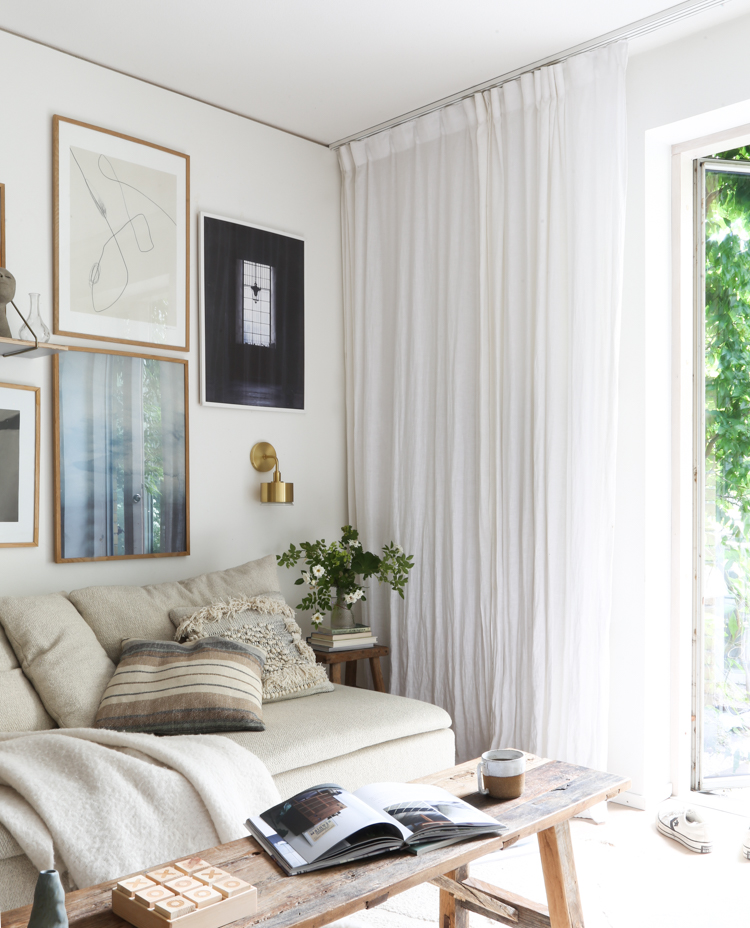
It looks mighty fine beside some of my favourite smaller items which include a vase by my dear artist friend Jennifer Idrizi in nearby Lund and two darling figurines by local Malmö artist Simon Vendin - the latter of whom keep a good eye on things when we're not home! 


I hope you enjoyed reading about the magnificent CH07 Shell Chair! If you're curious, read more about it over at Carl Hansen & Søn.

I have had the great privilege of capturing quite a few iconic danish design pieces in my home over the past few years - here are some of my favourites: 


Do you have a favourite item of furniture that you dream of owning one day? If so, do tell us more below! 

I hope you have a 'trevlig helg' (lovely weekend)! See you Monday!

Niki

Our DIY Budget Powder Room Makeover

Not your standard opening picture. But I thought I'd show an honest 'before' picture of our downstairs bathroom - swimsuits and all. 

We've been putting off renovating this room ever since we moved in fifteen years ago and it's still sporting the same red ceiling and blank walls. There was nothing wrong with it per se, it was just very plain and a little dated. Nothing that warrants ripping the entire room out and starting from scratch at least. Even so, it had become unloved and a dumping ground - there were even some skis in the shower! 

Renovating a bathroom, no matter how small, can be hugely expensive. But having painted the tiles in our laundry room, I felt optimistic that something could be done to our downstairs loo on a budget too!

Here is what we did. 

The first step was to paint the ceiling (I can't tell you how satisfying it was!). We used a white from the Jotun Lady Aqua range. The floor also got a makeover with 3V3 tile paint in Tarmac

And then came the rest:

Ta daaaa! 

There's quite a lot at play here. We removed the glass shower door and hung up an L-shaped shower rod (we bought a simple white one and then painted it in the same paint as the floor). The shower curtain (light stone from Humdakin) and rattan matt add a softness to the room and help to dampen the sound - always good in a guest bathroom!  

We kept the wall tiles (one of the biggest costs when renovating bathrooms is the work that goes into replacing tiles) - but since the walls were so vast and blank, we decided to put up a glass cabinet (Hastrup from Jysk). It was no easy feat; we had to use a special sensor to detect what was behind the wall. The last thing we wanted to do was drill through a pipe or electric cable. This is a major danger when drilling into bathroom walls, I'd highly recommend calling in an expert to avoid any accidents! 

When it comes to budget makeovers, I am a firm believer that the devil is in the details. Picking out smart pieces really help to elevate a room. The brushed brass toilet brush and toilet roll holder are both from Danish brand D-line

I've had the little rustic stool for years (pick up a similar antique stool here*). And the art is by Swedish painter Carola Kastman

The next step was to give this corner an overhaul:  


Here is the result, drum roll please....

We tried to keep the existing bathroom cabinet and sink but it simply wasn't practical for numerous reasons, so in the end we swapped it out for this very reasonably priced cabinet, sink and tap from Hornbach

I updated the colour on the cabinet using Mohair from Jotun Lady (thinking about it now, I probably should have used a specific bathroom paint, so let's see how it fairs!) and added knobs and a towel rail from D-line


I have never liked the plastic silver lights that were here when we moved in. The problem was we didn't want the faff and expense of changing the mirror so we had to find a light that exactly fitted the holes! I was very relieved to finally stumble across this bathroom light in Bauhaus! 


The final corner to get a simple makeover was this one: 


We swapped out the existing aluminium towel hooks for pretty handcrafted ones from D-Line (which match the other details). 

I'm a big fan of baskets (these are from Granit and IKEA) - they make each hook go a lot further and now we have a lot more space for bits and bobs like swimwear, slippers (from Humdakin), hair stuff etc. 

This is how this corner looks now: 


Right folks. That covers everything I think!

I hope you have enjoyed reading about our budget DIY bathroom makeover! If you have any questions just give me a shout below and I'll do my best to help. 

By the way, have you noticed how tidy it looks? I'd love for it to stay this way. But will I still find empty loo roll cartridges on the side when I go in? Definitely (does this drive anyone else nuts?). Will it be filled with drying swimwear and ten thousand towels within 24 hours? No doubt! 

But for today at least, I will be enjoying it in all its neat and tidy glory!

I hope you have a wonderful, relaxing weekend! 

Niki

A big thank you to Per for helping with so much of the DIY - I'm so lucky to have a handyman and physicist in the house! So much appreciation for the brainstorming and advice from Helen Sturesson too! 

Also, thank you for the press gifts D-line, Humdakin and IKEA.  

Twitter FaceBook

Pin It
18

A Peek at the Lights in My home and Studio!


Sponsored by HVLG International. All words and pictures are my own.

Do you find that when it comes to decorating a home, there's always some items that are easier to buy than others? And it's so personal! While I might be less good at sourcing rugs, I have a huge passion for lighting and it's one area of our home that I have fully covered! Could it be the dark Swedish winter? Or perhaps that I see lighting like art? Or maybe it's the huge variation waiting to be discovered. Either way, I'm always on the hunt!

Last week, I added three beautiful new gems to my home and studio from Hudson Valley Lighting Group International. While this was purely an instagram collaboration, I'm so happy with them, I thought maybe you'd like to see the gems here on the blog too! 

At home


In the corner of our sitting room I added the Nora wall sconce by Mitzi. I was drawn to it because it's like a jewel, brightening up what can be a fairly dark corner. It's also not too big which is great, as behind that curtain is our flatscreen TV and my children wouldn't be very happy with me if something were to obscure their latest series! Oh, the decorating struggles! 

This is the brass version, but it also comes in nickel if you prefer a silvery finish! Oh, and it's also suitable for use in the bathroom. You might recognise the style as Liv has a matching Nora pendant in her room (take a peek here). 


In the studio


A few years ago I made the big move out of my home office to a studio in the centre of Malmö, and I've never looked back! It certainly helps that I share my studio with two lovely, talented ladies (so many laughs as well as support and words of encouragement). 

Last week, I set up this Curves No.1 table lamp on my desk, and I have to say there was a lot of excitement 'Oohing and Ahhing' as we gathered around to admire it. The brass, rattan and linen details are beautiful! It's not all only aesthetics though - the height is adjustable and the lamp swivels, so it's highly practical too! 

Here's a closer look at the fine brass base and details.

You might also be excited (I was) to discover this table lamp has a sister - the  Curves No.1 floor lamp. Which now stands proudly beside the studio sofa. 

I was so happy to discover that this lamp was equally easy to put together - it took seconds for it to be up and running (I'm not one for a major amount of fuss, are you?). 

The lamp features the same brass and rattan details. And I love that it combines traditional touches with a modern aesthetic. It could fit in anywhere and be moved around at whim! 

It also features a foot button to turn it on and off - big bonus in my eyes! 

I hope you like these lamps as much as I do - and have enjoyed a peek inside my home and studio today.

You can read discover more about them and see the full collection at Hudson Valley Lighting Group International (ships worldwide).

You can also see more of their lamps throughout my home and cabin here: 


Feel free to ask about any other details you see in my home and studio and I'll be happy to help in the comments below! 

I'll be back on Friday with a beeeeeautiful home tour. See you then! 

Stor kram!

Niki

All words and photography my own ( Niki Brantmark / My Scandinavian Home) 

Twitter FaceBook

Pin It
4

The New Wishbone Chair in Slate in my Home!


Paid partnership with Carl Hansen & Søn, all words are my own and I only work with brands I love and think you will too. This post has been edited with a correction. 

I love chairs. People often think that you need to buy a whole set, and that they're specifically designed to go round a dining table. But in my mind, chairs are like art. Functional art. And they can look just as beautiful and be practical anywhere in the home. Especially when they are as iconic as the Wishbone chair CH24. This classic Danish beauty, designed by  Hans J. Wegner is over 70 years-old, but you'd never know it thanks to its timeless design. 

I of course love the oak version, but I was also very excited to hear about a new collaboration between danish furniture company Carl Hansen & Søn and London-based designer Ilse Crawford. A partnership which resulted in nine new colour variants of the Wishbone Chair which include soothing earthy tones of Pewter, Hollyhock, Barley, Seaweed, Terracotta, Clay, North Sea, Slate and Falu.

This fine specimen in my bedroom is the 'Slate' variation. 

The chairs have then be finished in a translucent, non-toxic, water-based paint for depth to the familiar shape and also to allow the natural grain to shine through. Everything else about the chair remains intact including the FSC certified beech and natural cord (on a recent trip to Copenhagen, I watched the weavers in action and the level of craftsmanship was immense!). 

It's been a while since I've shown this little corner of my home. Per built these shelves over 15 years ago and they are still going strong! They're not very solid though, hence why they only hold a whittled down curated display including clay figures by local artists Simon Vendin and a bowl by Helena Gorne, a piece of drift wood picked up on a volcanic beach in Iceland, art by my children and lots of plants and photos! 

As I mentioned at the beginning of the post, I think chairs can look lovely in pretty much all rooms of the home. Perhaps my favourite spot for this one is simply against the wall in my bedroom (beside the desk). I like that it means you can more clearly see the outline of the shape. 

Until of course, I cover it in clothes - I give it two days! 


I know it would look beautiful by the table too - either as an entire set or one at the end, perhaps one day I'll move it down, we'll see! 

Are you a fan of the wishbone chair too? 

If you're tempted, see the complete collection over at Carl Hansen & Søn

It's been ages since I've featured my home here, if you'd like to see more corners, check out my home  although, I'm starting to feel some updates are needed so maybe you're better off looking at my cabin or better still, there are also lots of beautiful home tours to discover in the archive if you'd like some inspiration this weekend! 

I hope you a relaxing couple of days, thank you so much for stopping by.  

Vi ses på måndag! 

Niki

NOTE I previously stated that this was a limited edition collection, which was an error. The nine CH24 Sift collection will be permanent. The post has been corrected accordingly. Sorry for any confusion! 

Photography & styling: Niki Brantmark - My Scandinavian Home. 

Twitter FaceBook

Pin It
10

Before and after: Our Attic Make-over


Sponsored by Elfa, all words and photos are my own. I only ever work with brands I love. 

Last January, I announced it was finally time to organise our home - having lived in our house for 15 years, it was well overdue! I'm proud to say, I stuck to my word and 2022 made-over our laundry room, created a new wardrobe in the bedroom and installed wall to wall shelving and a desk in Allie's 'tween' room. But there was one space which needed the biggest overhaul of all: our attic. 

Located off our bedroom at the top of the house, our attic has been a dumping ground for just about anything and everything. Christmas decorations, yoga gear, frames, camera equipment, and all my styling props are part of the jumbled mess. To retrieve something is like a scene from Mission Impossible: climbing over and under things, searching for a needle in a haystack! Here's how it looked before (embarrassingly): 

Despite the mess and low ceiling, there were a couple of things in our favour (every cloud, right?) - good solid walls, and a nice wood floor. So, I turned to the Elfa online planning tool and design team and we got to work planning the space! 

This is one of two storage rooms that we have at home and I was keen to make this feel accessible so that styling props and other items were in easy reach. I sometimes need to work with mood boards and comparing items them side-by-side, so I was also keen to ensure a comfortable open-space in the centre of the room! 

Design 
Having had plenty of experience with Elfa for theist part of a year. I was keen to use the storage system init this space too. If you're not familiar with the Swedish storage system, it's centred around a series of vertical rods to which you can click in an array of units such as shelves, drawers, hooks, mirrors, peg boards and more - making it completely flexible and suitable for any space. 

It made sense to make full use of the width and height of the walls in the attic and I was keen for everything to be on display to make it as easy as possible to find things, so we opted for open shelves and see-through mesh drawers. 

For the wall to the right, the plan included storage for creative items (far right), as well as space for tools, nails and other small objects. 

The ceiling height is really low at the back of the room. We therefore felt it would be an excellent place to install long items such as rugs, a tent, yoga equipment and other large items. 

The wall on the left is reserved for styling props including cushion covers, blankets, vases, clothes, and picture frames. I changed the section to the left to include a clothes rail 

With the plans in place, the next step was to clear out the room and have a really good declutter! There were quite a few trips to the second-hand store and our bedroom looked like this for a few days:

But it was well worth the effort. 

Ready to see the results? 

After - wall to right

Fun is not usually a word I would associate with tidying up, but I can't tell you how much I enjoyed putting everything in its place. 

The open melamine shelf has proven really handy for files and small storage boxes and I've used mesh drawers underneath for ribbons, cards, stationary, photography equipment, cables and Christmas decorations. 


Craft section

One of my favourite areas is the craft / DIY section which includes a storing board with hooks and hoops for tools, small trays for nails and other small items and metal rings (book ends) and a reversible tray to suspend rolls of paper. 


After - end wall 

A wire shelf with valet rods suspended underneath provides space for longer items. I also like that there's floor space underneath for furniture. 


After - wall to the left


The above picture gives you an idea of just how low the ceiling is. Since I'm often kneeling down, I added a rug for comfort! 


This side of the room has open shelving (including melamine shelves and wire shelf baskets) to display all my textiles and books. I also installed a clothes rod, the area underneath of which doubles up as an area to store larger prints and frames.  


We're so thrilled with the results. Rather than scrambling around searching for things, it's actually a joy to retrieve stuff and put it back in its place again afterwards! 

I hope you like our new highly organised attic space as much as we do! Do you think it will stay this tidy? Knowing my family, it could be a battle, but we'll give it a shot! 

In case you're feeling inspired to organise your attic space, I can highly recommend the Elfa planning tool or asking for help from Elfa professionals (available pretty much worldwide). The Elfa storage system offers a solution for just about anything - no matter how big or awkwardly shaped so you'll have your space organised in now time. 

Do you have any rooms or areas in your home you're hoping to organise in 2023? If so, I'd love to hear more about your plans! 

Niki

A special thank you to Christine Dahlman, Storage Expert at Elfa, who has been so helpful and instrumental to the results! 

Photography: Niki Brantmark

Twitter FaceBook

Pin It
19

Subscribe To My Scandinavian Home

Subscribe to My Scandinavian Home

skovby ad


site by ANAAR

This website uses cookies to ensure you get the best experience on our website.
MORE INFO