


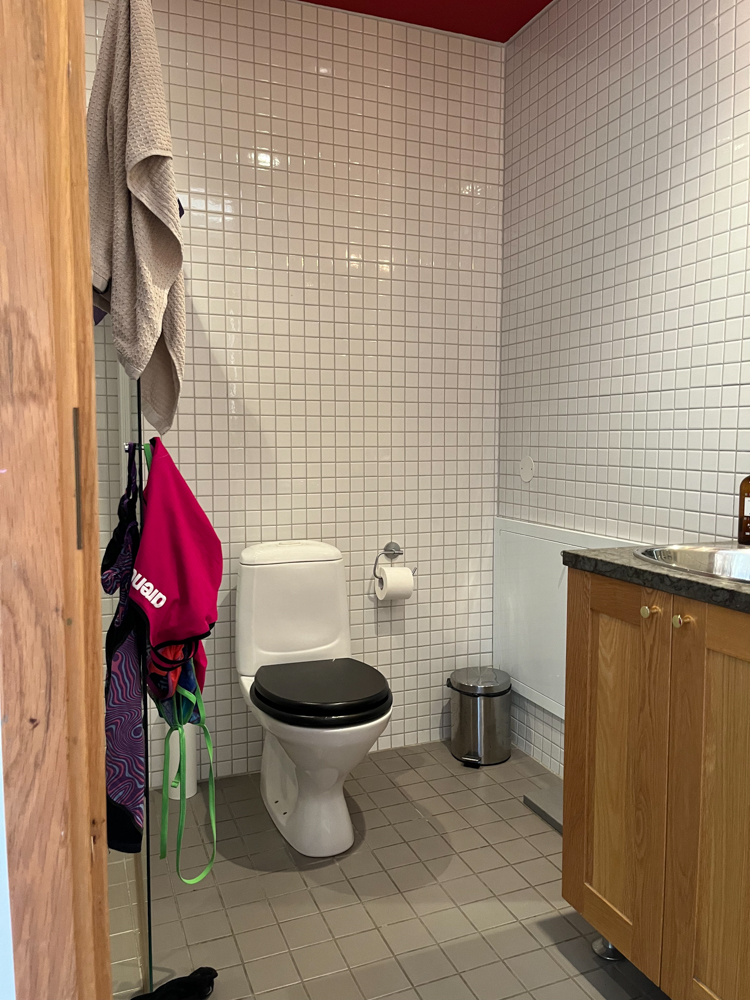
Not your standard opening picture. But I thought I'd show an honest 'before' picture of our downstairs bathroom - swimsuits and all.
We've been putting off renovating this room ever since we moved in fifteen years ago and it's still sporting the same red ceiling and blank walls. There was nothing wrong with it per se, it was just very plain and a little dated. Nothing that warrants ripping the entire room out and starting from scratch at least. Even so, it had become unloved and a dumping ground - there were even some skis in the shower!
Renovating a bathroom, no matter how small, can be hugely expensive. But having painted the tiles in our laundry room, I felt optimistic that something could be done to our downstairs loo on a budget too!
Here is what we did.

The first step was to paint the ceiling (I can't tell you how satisfying it was!). We used a white from the Jotun Lady Aqua range. The floor also got a makeover with 3V3 tile paint in Tarmac.
And then came the rest:
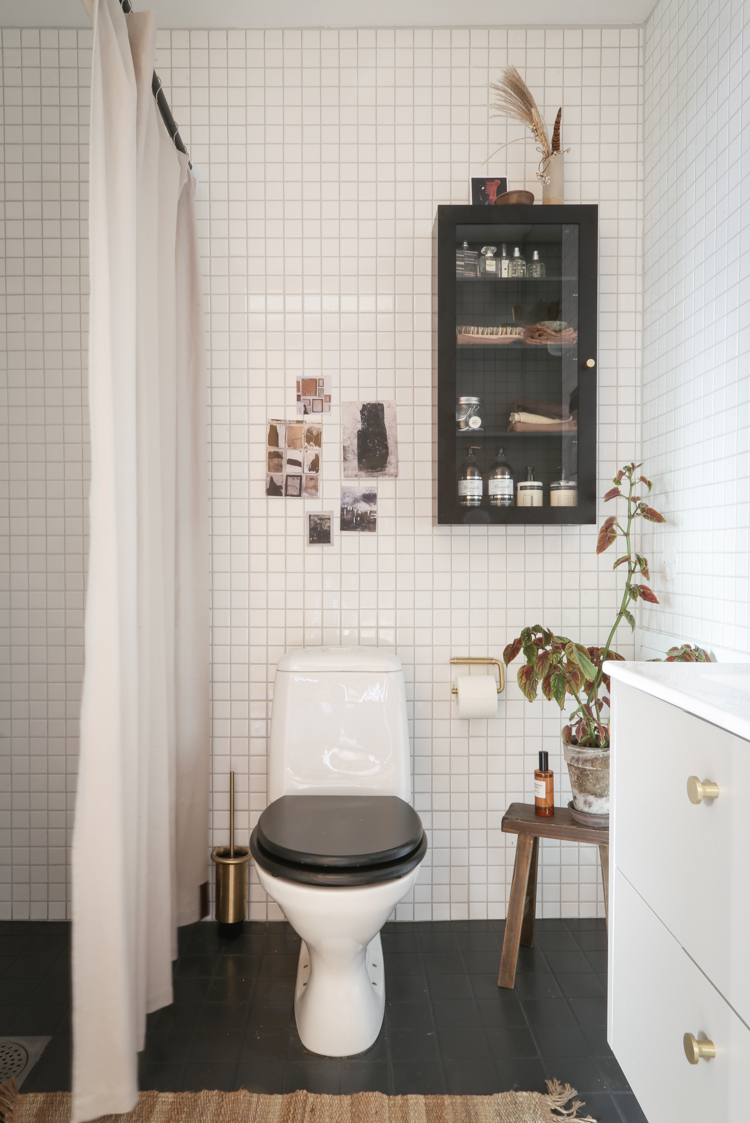
Ta daaaa!
There's quite a lot at play here. We removed the glass shower door and hung up an L-shaped shower rod (we bought a simple white one and then painted it in the same paint as the floor). The shower curtain (light stone from Humdakin) and rattan matt add a softness to the room and help to dampen the sound - always good in a guest bathroom!

We kept the wall tiles (one of the biggest costs when renovating bathrooms is the work that goes into replacing tiles) - but since the walls were so vast and blank, we decided to put up a glass cabinet (Hastrup from Jysk). It was no easy feat; we had to use a special sensor to detect what was behind the wall. The last thing we wanted to do was drill through a pipe or electric cable. This is a major danger when drilling into bathroom walls, I'd highly recommend calling in an expert to avoid any accidents!

When it comes to budget makeovers, I am a firm believer that the devil is in the details. Picking out smart pieces really help to elevate a room. The brushed brass toilet brush and toilet roll holder are both from Danish brand D-line.
I've had the little rustic stool for years (pick up a similar antique stool here*). And the art is by Swedish painter Carola Kastman.
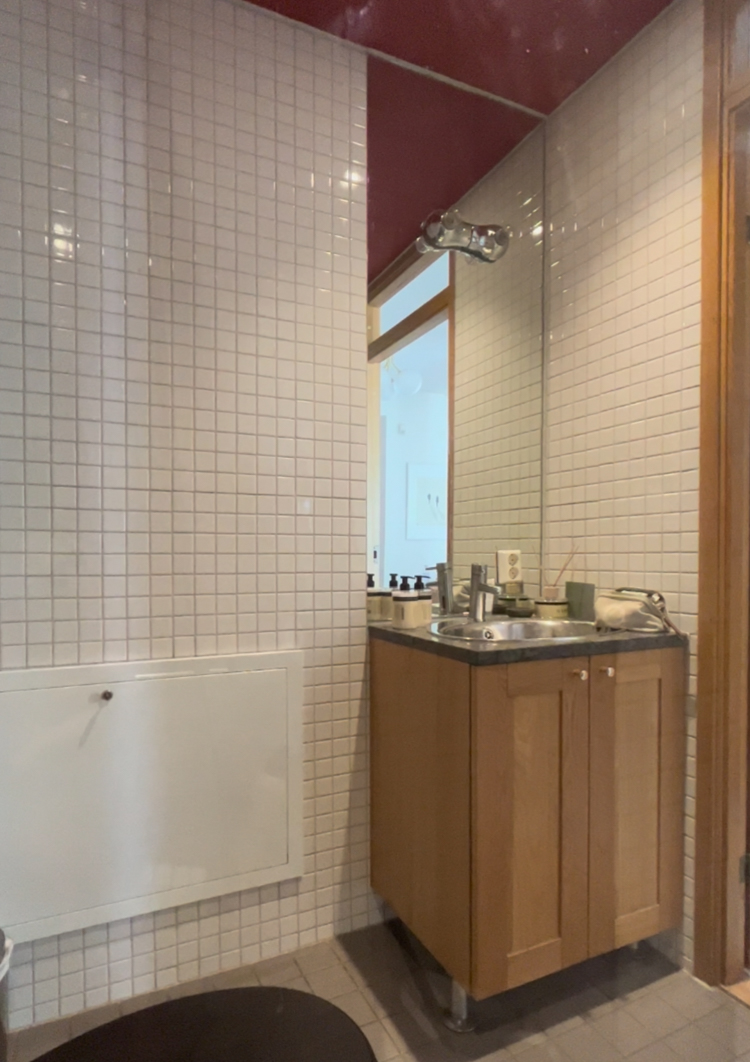
The next step was to give this corner an overhaul:
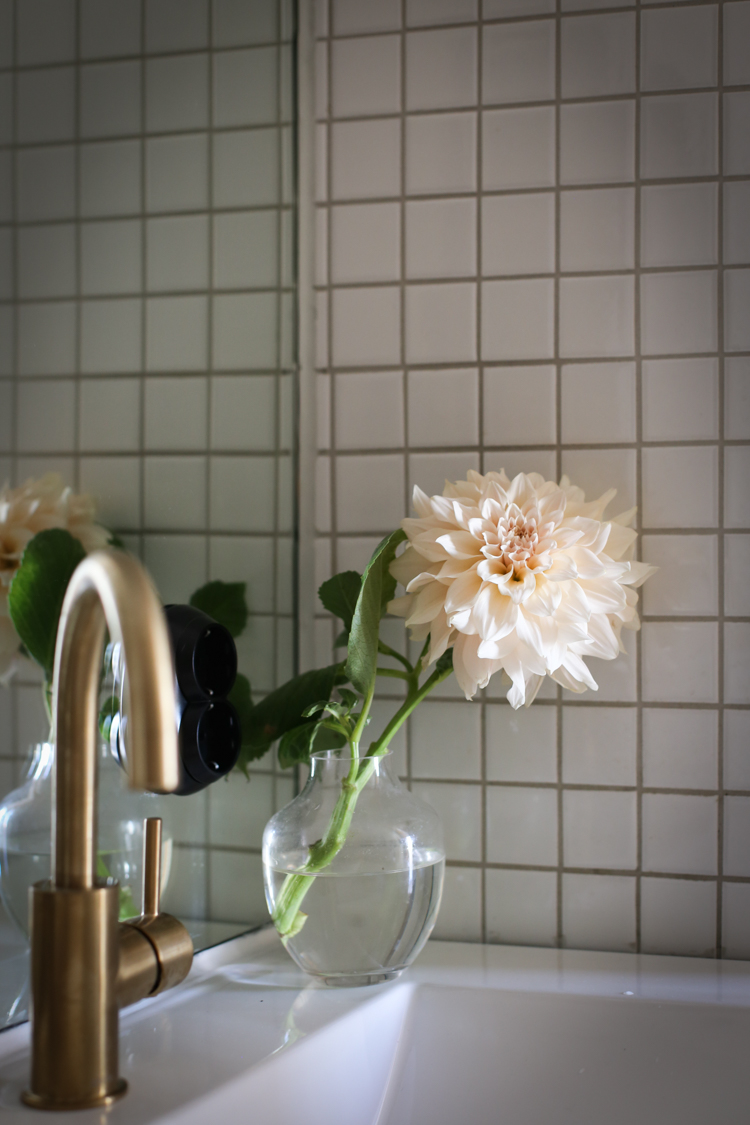
Here is the result, drum roll please....

We tried to keep the existing bathroom cabinet and sink but it simply wasn't practical for numerous reasons, so in the end we swapped it out for this very reasonably priced cabinet, sink and tap from Hornbach.

I updated the colour on the cabinet using Mohair from Jotun Lady (thinking about it now, I probably should have used a specific bathroom paint, so let's see how it fairs!) and added knobs and a towel rail from D-line.


I have never liked the plastic silver lights that were here when we moved in. The problem was we didn't want the faff and expense of changing the mirror so we had to find a light that exactly fitted the holes! I was very relieved to finally stumble across this bathroom light in Bauhaus!
The final corner to get a simple makeover was this one:

We swapped out the existing aluminium towel hooks for pretty handcrafted ones from D-Line (which match the other details).
I'm a big fan of baskets (these are from Granit and IKEA) - they make each hook go a lot further and now we have a lot more space for bits and bobs like swimwear, slippers (from Humdakin), hair stuff etc.
This is how this corner looks now:

Right folks. That covers everything I think!

I hope you have enjoyed reading about our budget DIY bathroom makeover! If you have any questions just give me a shout below and I'll do my best to help.
By the way, have you noticed how tidy it looks? I'd love for it to stay this way. But will I still find empty loo roll cartridges on the side when I go in? Definitely (does this drive anyone else nuts?). Will it be filled with drying swimwear and ten thousand towels within 24 hours? No doubt!
But for today at least, I will be enjoying it in all its neat and tidy glory!
I hope you have a wonderful, relaxing weekend!
Niki
Also, thank you for the press gifts D-line, Humdakin and IKEA.
Wow! This looks really great!! I am a little surprised that you took down the glass though. Here in the US, that's very expensive. When we gutted our hall bath, we ended up with a rod and curtin b/c we just didn't want to spend another thousand dollars on a glass enclosure. But you do you! It's fabulous!
ReplyDeleteYes, thank you so much for this question. We put the glass wall up originally - and I can agree, they are eye wateringly expensive! We removed it for three reasons: firstly it gave us greater flexibility, the shower curtain can be completely pulled back which makes the room feel much more spacious when the shower isn't in use - which is most of the time (it's the downstairs loo / bathroom and we have another one upstairs beside all the bedrooms).
DeleteSecondly, it felt quite cramped behind the glass when you took a shower. And finally, we had a problem with sound proofing so we were keen to put some textiles in to dampen the noise.
The good news is we were able to sell it really easily on the secondhand market. I was surprised to find a lot of nice ones on the same sight and would advise anyone looking to buy a shower glass door to look on ebay or other sites first! You might just find a bargain that perfectly fits your space.
Makes total sense - shower curtains are cheap, cheerful and easy to keep clean. But I am surprised a ceiling track hasn't ousted the traditional rod in most bathrooms.
DeleteWhat a lovely make over- so well done ..again! How does the tile paint hold up? We have quite a bit of very dated floor tile in our place - but it's in the entryway, kitchen and main bathroom ( so much of this tile). Do you think the paint would hold up to the traffic that these three areas get? Love your blog- its always a sweet break at my desk.
ReplyDeleteThank you :). I would only recommend tile paint in low footfall areas - definitely not in a hallway or kitchen sadly. It's worked well in our laundry room so far and I'd be happy to update everyone on how well it works in our downstairs loo over time! Watch this space...
DeleteWhat an inspiring makeover! The details you’ve added bring style and charm to the space. Love the spirit of refreshing rooms by working with the bones that are present. Less environmental waste, less expensive and less emotional and physical toll on the humans, too. Really lovely!
ReplyDeleteThank you so much Pamela :)
DeleteI love real life makeovers. Great job!
ReplyDeleteI work as a therapist with disabled people, and solid wall shower enclosures can make it very hard to incorporate durable medical equipment should the need arise. I know that wasn't the reasoning for the makeover, but if you ever have a guest with mobility problems, your bathroom can be adapted easily to meet their needs.
This is a really interesting and important point, thank you so much for sharing this. My parent's house had to be very quickly adapted when my father became ill a few years ago and he had to move downstairs so I've seen this firsthand. I love the thought of my home being welcoming and inclusive to all visitors!
DeleteWhat a gorgeous little bathroom! (not that I would expect anything but from Niki). :-)
ReplyDeleteI am totally fascinated by the little sliver of a tile in the corner and that the sliver is exactly the same size in every single row. Something like that would not have been possible in my 1960's house where the walls are not always straight and the corners are not always 90 degrees.
You always have a great knack for pointing out details - I love that! This house was built in 2001 so fortunate enough to be pretty symmetrical. I've seen the challenges of renovating old houses from when we updated our kitchen at the cottage, it's a whole different ball game!
DeleteThat utility/box/door/thing on the wall next to the sink would drive me crazy. If I would remove the sink I would have put something wall to wall just to cover it up with some kind of horizontal surface and have some hooks underneath for hand towels just to hide that. Love what you did though! Good solutions on a budget! If you want to add more textile then you could mount a nice fabric on the outside of your shower curtain. Thank you for sharing!
ReplyDeleteYou'd have thought so looking at these pictures - and of course it crossed my mind during the renovation. But it's funny what you get used to. I honestly don't even notice it in my day to day.
DeleteThank you for sharing your ideas with the fabrics, always appreciated!
Yes, it is interesting what one gets used to :-) I had a missing skirting board for three years! It took me ten minutes to add it once I just did it. The "selective seeing" is a wonderful thing and makes life sooooo much easier! My idea with some sort of surface would be a lot more work.
DeleteI can totally see how that would happen! I mean, we lived with the red ceiling for 15 years too!
DeleteBut still, I do like your idea of putting something in front of the 'white box'. Watch this space!
Just so clever. Looks lovely. Very inspiring
ReplyDelete