Scrolling

Before and after: Our Attic Make-over


Sponsored by Elfa, all words and photos are my own. I only ever work with brands I love. 

Last January, I announced it was finally time to organise our home - having lived in our house for 15 years, it was well overdue! I'm proud to say, I stuck to my word and 2022 made-over our laundry room, created a new wardrobe in the bedroom and installed wall to wall shelving and a desk in Allie's 'tween' room. But there was one space which needed the biggest overhaul of all: our attic. 

Located off our bedroom at the top of the house, our attic has been a dumping ground for just about anything and everything. Christmas decorations, yoga gear, frames, camera equipment, and all my styling props are part of the jumbled mess. To retrieve something is like a scene from Mission Impossible: climbing over and under things, searching for a needle in a haystack! Here's how it looked before (embarrassingly): 

Despite the mess and low ceiling, there were a couple of things in our favour (every cloud, right?) - good solid walls, and a nice wood floor. So, I turned to the Elfa online planning tool and design team and we got to work planning the space! 

This is one of two storage rooms that we have at home and I was keen to make this feel accessible so that styling props and other items were in easy reach. I sometimes need to work with mood boards and comparing items them side-by-side, so I was also keen to ensure a comfortable open-space in the centre of the room! 

Design 
Having had plenty of experience with Elfa for theist part of a year. I was keen to use the storage system init this space too. If you're not familiar with the Swedish storage system, it's centred around a series of vertical rods to which you can click in an array of units such as shelves, drawers, hooks, mirrors, peg boards and more - making it completely flexible and suitable for any space. 

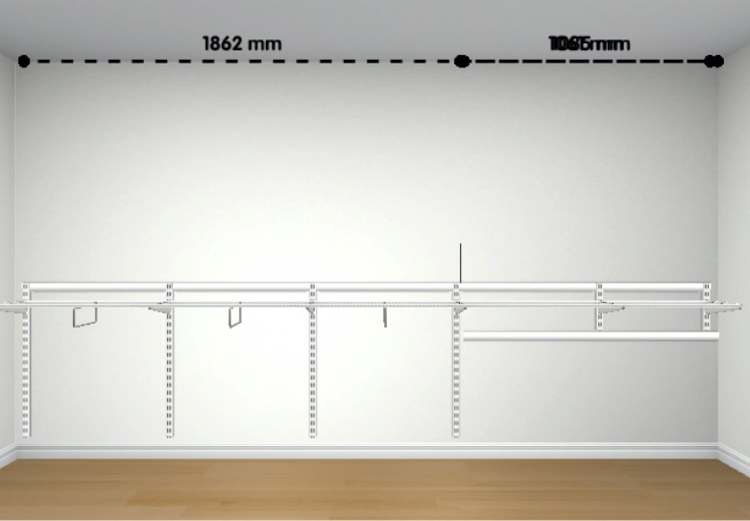
It made sense to make full use of the width and height of the walls in the attic and I was keen for everything to be on display to make it as easy as possible to find things, so we opted for open shelves and see-through mesh drawers. 

For the wall to the right, the plan included storage for creative items (far right), as well as space for tools, nails and other small objects. 

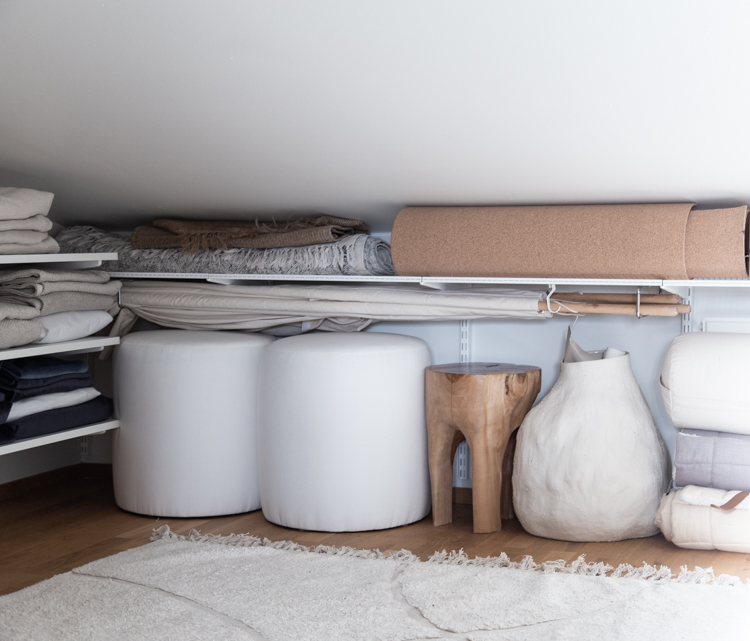
The ceiling height is really low at the back of the room. We therefore felt it would be an excellent place to install long items such as rugs, a tent, yoga equipment and other large items. 

The wall on the left is reserved for styling props including cushion covers, blankets, vases, clothes, and picture frames. I changed the section to the left to include a clothes rail 

With the plans in place, the next step was to clear out the room and have a really good declutter! There were quite a few trips to the second-hand store and our bedroom looked like this for a few days:

But it was well worth the effort. 

Ready to see the results? 

After - wall to right

Fun is not usually a word I would associate with tidying up, but I can't tell you how much I enjoyed putting everything in its place. 

The open melamine shelf has proven really handy for files and small storage boxes and I've used mesh drawers underneath for ribbons, cards, stationary, photography equipment, cables and Christmas decorations. 


Craft section

One of my favourite areas is the craft / DIY section which includes a storing board with hooks and hoops for tools, small trays for nails and other small items and metal rings (book ends) and a reversible tray to suspend rolls of paper. 


After - end wall 

A wire shelf with valet rods suspended underneath provides space for longer items. I also like that there's floor space underneath for furniture. 


After - wall to the left


The above picture gives you an idea of just how low the ceiling is. Since I'm often kneeling down, I added a rug for comfort! 


This side of the room has open shelving (including melamine shelves and wire shelf baskets) to display all my textiles and books. I also installed a clothes rod, the area underneath of which doubles up as an area to store larger prints and frames.  


We're so thrilled with the results. Rather than scrambling around searching for things, it's actually a joy to retrieve stuff and put it back in its place again afterwards! 

I hope you like our new highly organised attic space as much as we do! Do you think it will stay this tidy? Knowing my family, it could be a battle, but we'll give it a shot! 

In case you're feeling inspired to organise your attic space, I can highly recommend the Elfa planning tool or asking for help from Elfa professionals (available pretty much worldwide). The Elfa storage system offers a solution for just about anything - no matter how big or awkwardly shaped so you'll have your space organised in now time. 

Do you have any rooms or areas in your home you're hoping to organise in 2023? If so, I'd love to hear more about your plans! 

Niki

A special thank you to Christine Dahlman, Storage Expert at Elfa, who has been so helpful and instrumental to the results! 

Photography: Niki Brantmark

Twitter FaceBook

Pin It
19

Before and After: Our Laundry Room Make-over


Paid partnership with Elfa, all words and pictures are my own and I only ever work with brands I love and think you will too. 

Do you have a neglected room in your home? Despite living in our house for almost fifteen years (wow, has it been that long?), we've never touched our laundry room (except of course, to do our laundry!). 

It's situated on the middle floor beside the bathroom and bedrooms and is a small, windowless room - even so it's an absolute godsend!

At the beginning of the year, I declared that this would be the year we'd finally organise our home, and so far, we've created a new wardrobe and sorted Allie's bedroom. And now it's time to give our laundry room some tender loving care, with a little help from Elfa, who make super smart storage solutions. 

Here's how we transformed the room from an unloved space to a fresh, beautifully smelling and practical laundry room. 

Before 

'Don't air your dirty laundry in public' - so the saying goes. Thankfully, everything in these pictures is clean. Even so, it doesn't make it any less embarrassing! 

A narrow space, our laundry room has bright blue tiles on the floor, a row of simple hooks along the wall, and a drying rack hanging from the ceiling. The latter was probably our biggest bug bear as it swings around when you try to hang clothes on it, and Per constantly bangs his head on it while ironing his shirts. 

Stowed against the wall, the ironing board (which is desperately in need of a new cover - cringe!) often slides down in the night making an alarming clang.

On the opposite side is the washer and dryer as well as shelves where we keep bedlinen and towels (and the odd rogue item such as er, sunhats!). There's also a handy sink and cupboards which we rarely use as they're quite hard to get to beside the hanging dryer. 

OK, embarrassing moment over. Time for the fun bit: the transformation!

The plan


Wall mounted storage
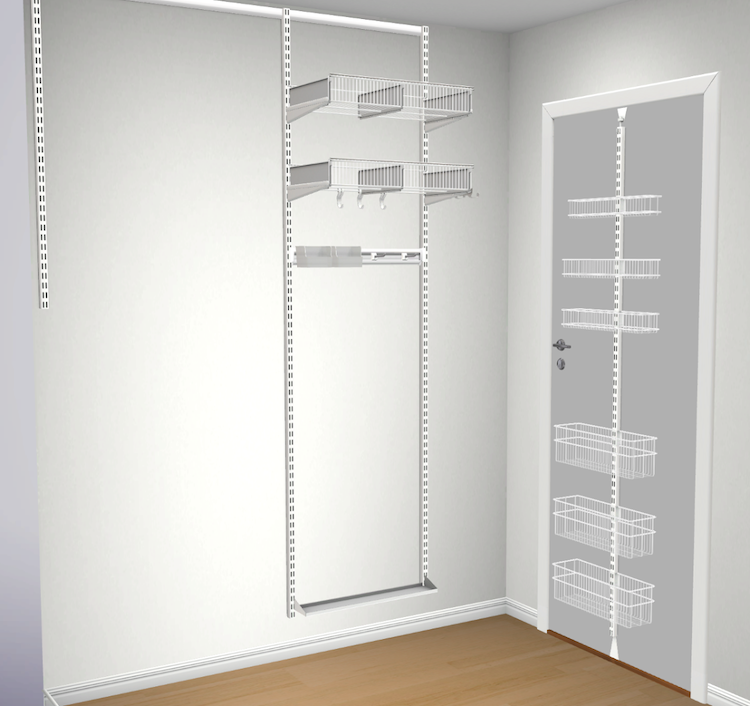
In a small space like this, wall mounted, flexible storage is key. Elfa helped to design this highly functional formation for us.  The beauty of this system is that it's centred around wall hung tracks to which you can click-in all kinds of units and accessories such as shelves, drawers, hooks etc. You can also add to the arrangement over time. 

The wide section on the left is for two wall mounted clothes dryers and on the right, we'll have space for wall mounted shelves and hooks. 

We actually opted for one central bar in the end - but if you're inspired to do something similar and would like to make your space even more practical, you could opt for two central brackets to make your drying shelves even more adaptable to the space. 

On door storage
I've had my eye on the on door storage ever since my first post about Elfa. Centred around a central bracket, the baskets can be moved up and down. You can also add hooks. It's perfect place for all our laundry soap as well as other accessories. 

Prepping the room


We wanted the space to be more in keeping with the rest of the home. It can be really costly to re-tile, so instead we bought a special V33 tile paint which is especially designed for bathrooms. Per and I applied several layers to the wall (white) and floor (light grey). I've actually never tried a tile paint before and I'm amazed at the results! 

The next step was to lighten the shelves and worktop. To do this, we sanded down the oak before applying a special white oil wood treatment and finish by Osmo

And finally, we painted the rest of the room white before the ELFA units were installed. 

After


Tadaaaa! Can you believe this is the same laundry room? 

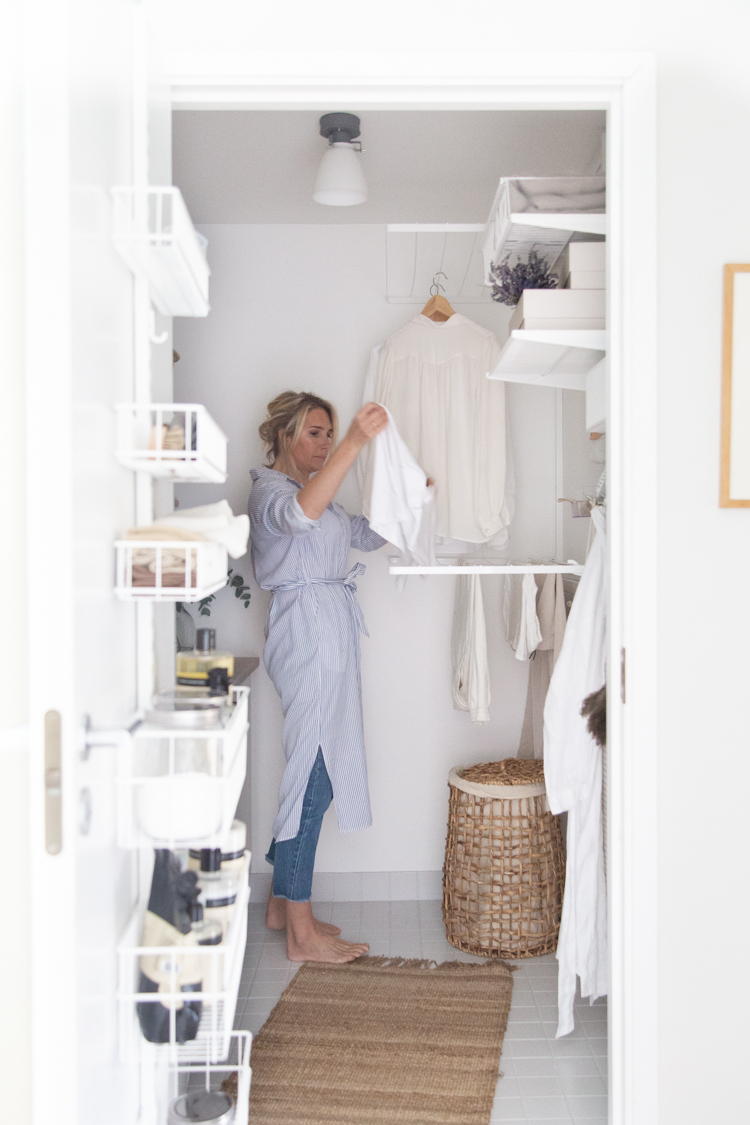
To the right of the room is the Elfa storage. We added two drying shelves, a wire shelf, a wire shelf basket, a storage track, storage track hooks and a clothing accessories kit

Collapsible drying shelves


Above you can see how the drying shelves collapse against the wall to make room for other things like sorting clothes and ironing. We can also change the height or remove them entirely. 

Shelves and hooks


The high shelves are ideal for extra storage (the storage boxes are part of a set from the Marie Kondo collection from Studio Elfa in Malmö).  

One of my favourite things is that now we can hang the iron from hooks. Oh, and did you notice I changed that gross ironing board cover to a new gingham one (from IKEA)? 

I also swapped out the old laundry baskets for a pretty rattan one (there's another laundry basket in the cupboard opposite for 'overflow' - we're a family of five, after all!).

Meanwhile, on the other side of the room...


The lighter wood, white tiles and light grey floor have really helped to freshen up the space. 

I also changed the door handles (it's all in the details friends!) - these are called Knob Helix, you might recognise them, as I have the same ones in our cabin kitchen.  And I picked up the baskets in town to store our bed linen and towels - so much neater! 

Door storage


Last but not least, the wonderful door storage is made up of a series of wire baskets which click into place. It's made space for all our laundry soap (I love Humdakin), cloths and other items - leaving the area around the sink clear. 


And there you have it, our new laundry room! 

Who would have thought that a room like this could bring so much joy (never thought I'd say something like that)? 

I hope you like the transformation as much as we do! 

Next step... the attic (gaaaah!). 

In the meantime, if you're in need of more storage at home, have a play arounds with the Elfa online 3D planning tool, or seek help from Elfa professionals (available pretty much worldwide) - you'll have your home organised in no time! 

If anyone's looking for me this weekend... I won't be hanging out here in the laundry room, hopefully, but I am thrilled with it! 

Have a great couple of days and see you Monday! 

Niki

Photography: Niki Brantmark / My Scandinavian Home
Styling: Helen Sturesson 

Twitter FaceBook

Pin It
26

A Quick Cosy Autumn Update in My Sitting Room!

Paid partnership with Bemz (contains affiliate links). All words and photos are my own and I only ever work with the brands I love. 

Sweden is a country with very pronounced seasons. From the abundance of light and beautiful warm days in summertime, to the icy cold, dark yet cosy winter - it's a constantly changing landscape. I have long admired the way Swedes adapt to and embrace each season - after all, each one offers something magical. 

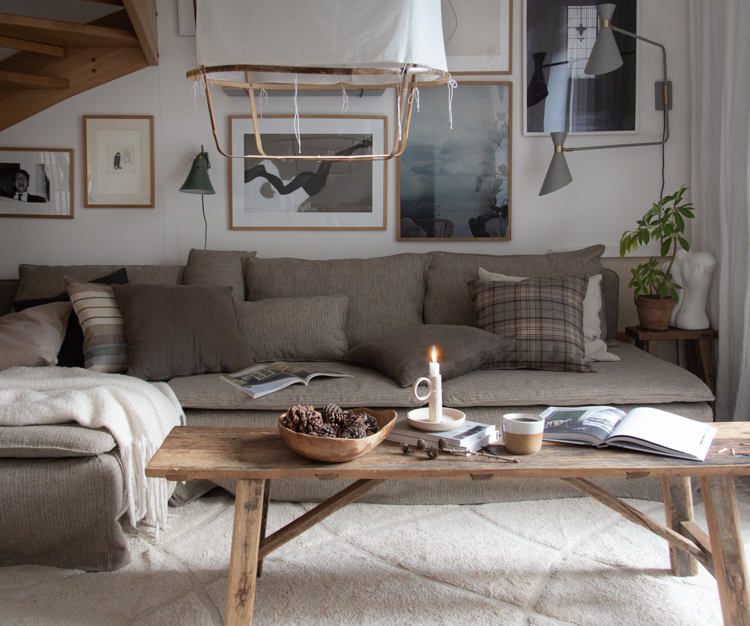
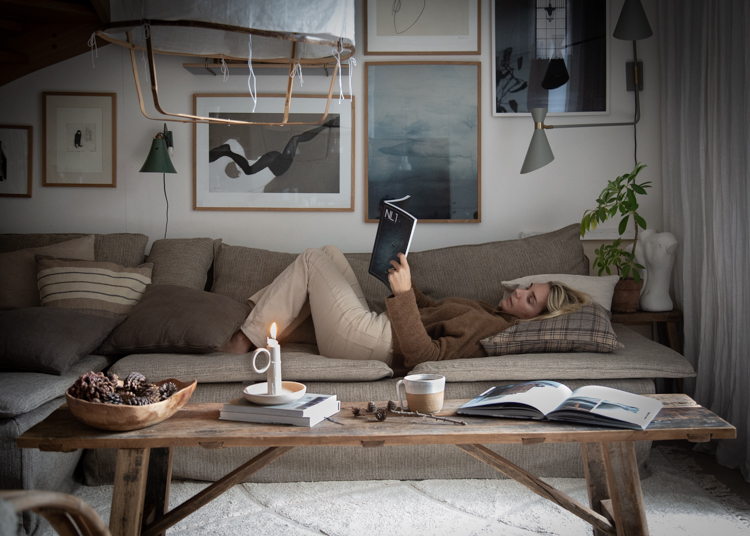
Autumn is a time for 'mys' (the Swedish version of 'hygge') - and when leaves swirl in the cold wind and the sun lowers in the sky, there's no place like home. My family tends to gather in the sitting room where we relax, watch TV (it's hidden behind the curtain to the right!), play games and read (oh, and eat too - no one is meant too, but I see the crumbs kids, I see them!). With the clocks going backwards in a few week's time, I felt it was time to do like the Swedes and add some cosy touches. 


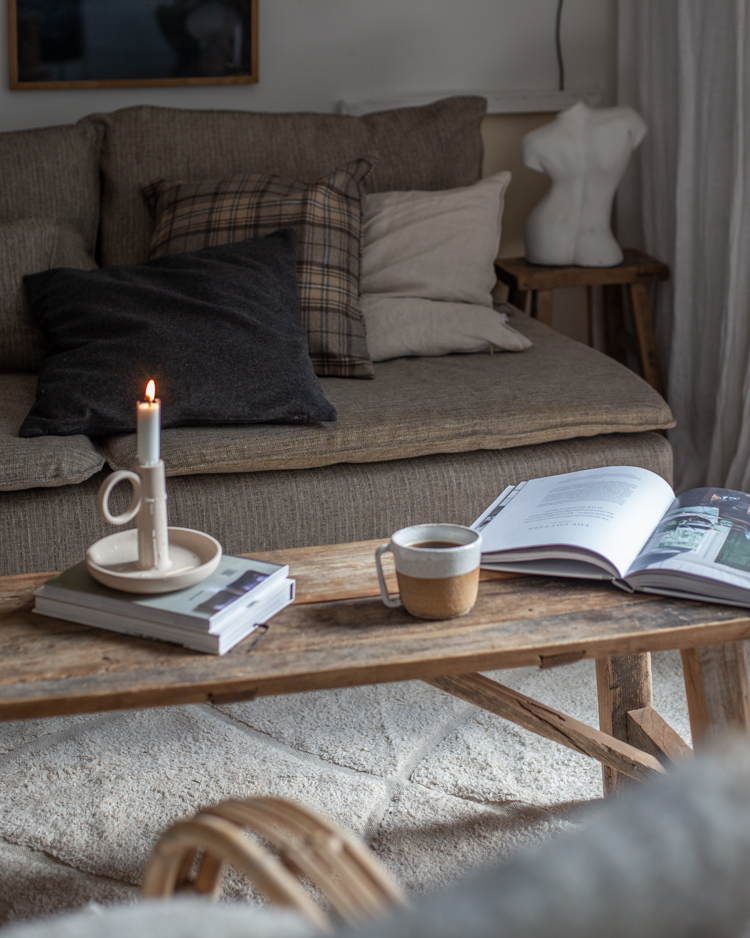
This season I really wanted to up the mys factor, so I've doubled up on candles, blankets, a fluffy rug, books and little foraged touches. But most importantly, I also updated our IKEA Söderhamn sofa with a new Classic Tweed cover in mole brown

I've been a fan of tweed ever since my University of Edinburgh days, so you can imagine my excitement when Bemz (who make designer slip covers for IKEA sofas) included a Tweed option as part of their new Grounded Heritage collection. To me, tweed conjures up images of walks through the Scottish Highlands followed by a steaming broth and a hearty red wine.  The darker shade (there are three to choose between) helped strike just the right mood! 

I also went a little wild with the cushions and selected Striped Twill in soft oak (above), Tartan Wool (below), and Melton Wool in stone and birch - all warm, earthy tones and tactile to touch. Lovely! 

You'll no doubt recognise my coffee table, I've had my vintage wooden bench for years and it's still going strong. I love that about natural materials, don't you? They just get better with age! 


My wall is a forever rotating gallery of prints, paintings and illustrations by the likes of Peytil (black tights), Hilde Mork (who's Norwegian home I featured here) and local artist Pearl Wallin which we've collected over the years. As with all things autumn and winter, good lighting is essential - and we have reading lamps at each end of the sofa for good measure! 


And finally, I invested in a new fluffy rug - to keep any drafts at bay! 

Right, time to enjoy this corner before everyone gets back from school. Sadly, it won't stay this tidy for long, but at least it'll always feel cosy! 

I hope you like this autumn update as much as we do! 

If you're looking for a cosy new cover for your IKEA sofa this autumn, I can totally recommend checking out the lovely new Bemz Grounded Heritage Collection. You can order 5 free fabric samples to test out the colour and texture before you decide which one to go for - perfect!

See previous changes I've made to our sitting room and bedroom with Bemz here

If you're wondering about anything else you see in my sitting room give me a shout below and I'll be happy to help! 

Have a toasty weekend friends!

Niki

Twitter FaceBook

Pin It
12

Our Little Cabin Bathroom Reveal + Get The Look


GSI Ceramica and CRISTINA Rubinetterie kindly partnered on our project. 

Hej kompisar! We've been spending some days up out our little cabin and I finally had a chance to snap some pictures of the bathroom! You might remember, back in December I shared the plans. With a room measuring 3.66 m2 / 38 f2, we didn't have a lot to play with. Even so, I was keen to create a beautiful and serene, spa-like space that also worked well with the main cabin living space. It was exciting to see it all come together little by little. And today, I'm excited to share the final result with you! But first let me provide a quick recap of the floorplan and design. 

Floorplan


The bathroom is located in the corner of the cabin underneath the sleep loft. It has a door out to the garden and one into the main living area. 
 
Design


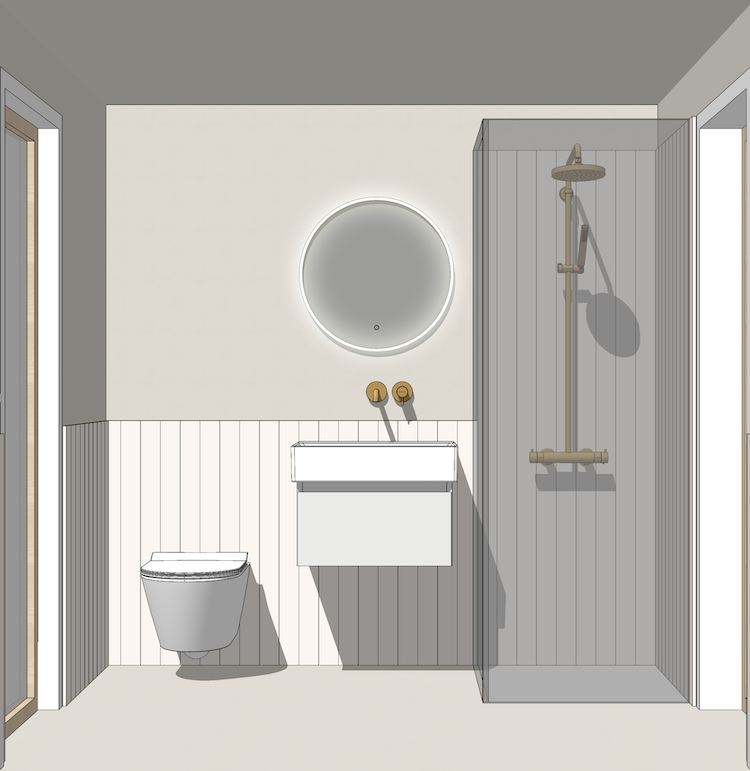
GSI Ceramica helped draw up this plan / design which felt perfect for the space! 


Entrance
When we first announced that the main cabin entrance is through the bathroom everyone looked at us like we were completely nuts - and even we had a few doubts! However, it's actually worked out brilliantly for three reasons: the bathroom has tiled floors, making it a perfect entrance in all weather, the hooks can double up for towels and coats, and finally, the shower is ideal for washing off sandy feet! 

Once in the cabin you can then open up all the other doors and windows and use those to enter and exit.

The reveal! 


I was eager to create a timeless bathroom with high quality fittings. I have to say, the calm tones, matt surfaces and stone floor create such a wonderful sense of serenity and it feels way more airy than the 3.66 m2! 

Here's the low down on all the details in case you're interested: 


Sink and cabinet


The floating Kube X Washbasin (60 x 47) and Prisma Unit cabinet are both from GSI Ceramica (available through Cosani in Scandinavia) who offer really high quality, well thought out units. I love that the sink has plenty of space at the back for soap / toothbrushes etc and the cabinet is really spacious (perfect when you have teenagers at home!). 

Loo


The wall-hung loo (WC Kube) is also from GSI Ceramica. At first, we were concerned about eating into the wall space - you need to move the wall out by around 20 cm to create space for a cistern (in this case we went with Geberit). But actually, it created a wonderful shelf which has proven to be invaluable! 

The best thing about the loo is the soft closing lid and Swirlflush technology - known for being the quietest flushing system in the world - which is absolutely ideal when you live in close quarters! I love the matt finish on the ceramic (inside the bowl it's glossy to guarantee maximum hygiene). 

Taps

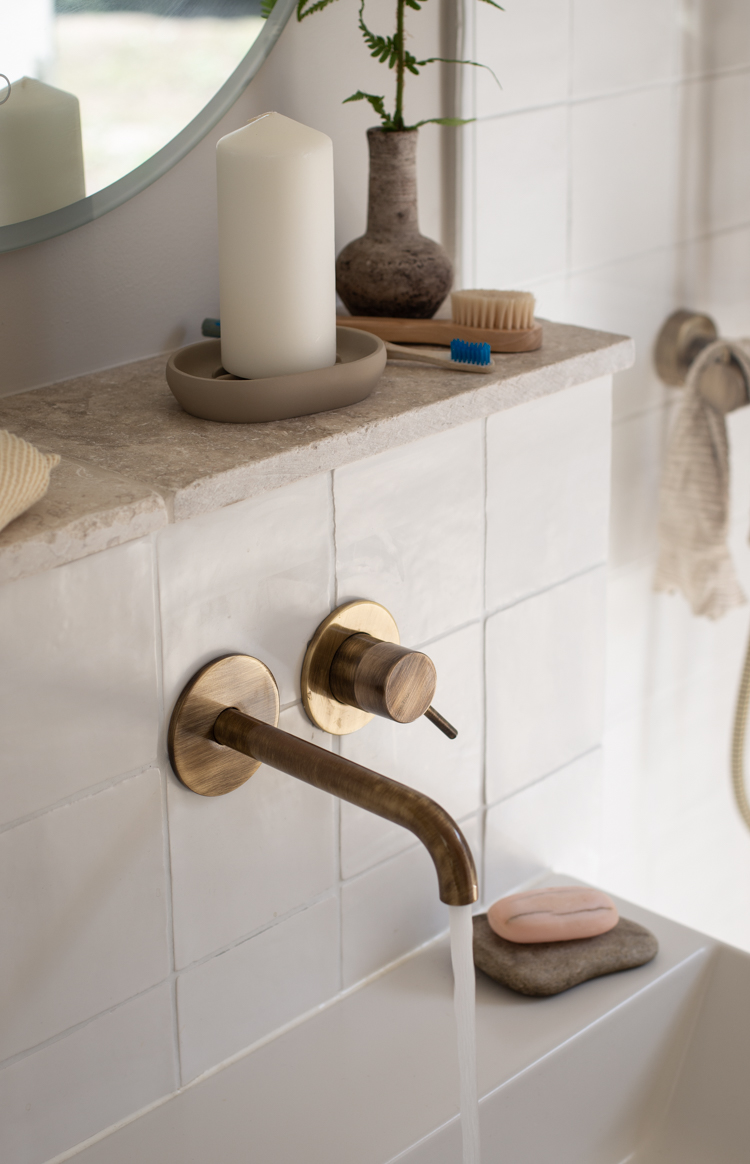
As you know from the various kitchens I've designed (including our cabin kitchen and cottage kitchen), I am a firm believer that a high quality tap can add SO MUCH to the overall experience. We chose a wall mounted tap (CRIT257) and shower (CRIT486) from the Tricolore Verde collection by CRISTINA Rubinetterie - in brushed old brass which has a raw look and lovely rich patina and feel beautiful to use! 


I especially like the addition of the hand shower, it's so well, handy! 

Shower door

 Thank you to everyone who offered tips and advice on the shower door, it was so helpful. Based on your input, I went with one glass shower wall which is 800 mm (the shower measures 800 mm deep and 700 mm wide) with bronze fittings and no door (it works great without a door). It's very sleek and barely noticeable. I'll need to add a cross bar across the top to secure it (it came with one so it's just to put it up). 

The mirror


For years at the cottage we've been using a mirror that's so mottled you can barely see your face. This time, we went for a modern Four Season Mirror with LED (60 cm) which is really practical!  

The walls 

The walls have been painted in Kalk from the Jotun Lady Aqua range which is certified specifically for use in bathrooms. 

The matt white tiles are from Stone Factory and have a beautiful hand cut feel. We used white grouting for a more minimalist feel. 

We really splashed (sorry!) out on the Tumbled Turtle tiles from Stiltje. I fell in love with the matt natural stone with its rich patina - it brings a sense of the rugged coastline into the bathroom. We used leftover floor tiles for the shelf above the sink and a corner shelf in the shower.

The hooks


I bought the simple wooden peg rail from Norrgavel. I might add another row at some point but for now, this will do nicely! 


Blinds


And finally, another great discussion was what to do about the glass door since there's no way you'd feel comfortable showering and worst still, sitting on the loo if people can see in! Thank you so much for all your input, in the end we chose this special Plissé blind that fixes to the door and moves with it when you open and close it. It can be pulled up from the bottom of the window and also pulled down from the top so you can basically move the blind to wherever you need it and still see the lovely nature outside!  

I hope you like tour bathroom as much as we do! I have to say, it's an absolute joy to use and well worth all the extra effort! 

I hope it may have given you some ideas if you're also planning a small bathroom renovation. If you have any questions, please do give me a shout below! 

Would you like to see more of our little cabin? Check out the kitchen, dining area and bedroom

Have a wonderful weekend friends. See you Monday! 

Niki

Twitter FaceBook

Pin It
6

Subscribe To My Scandinavian Home

Subscribe to My Scandinavian Home

skovby ad


site by ANAAR

This website uses cookies to ensure you get the best experience on our website.
MORE INFO