Before and After: A Rundown Croft Becomes an Idyllic Swedish Summer Cottage

When I first visited Sweden at the tender age of nine, I completely fell in love with my Swedish friends' summer cottage. It was everything you'd associate with the Swedish summer: a picturesque red and white cottage surrounded by woodland, lakes and the sweet scent of roses. Oh, and maybe the odd mosquito! When I stumbled across Alex and Erika's country home online yesterday, it took me straight back to that summer! Affectionately known as Gubbetorp, Alex and Erika's croft is located in the beautiful Östergötland countryside and has been lovingly restored one room at a time.  The pair share a passion for  antiques, vintage finds and up cycling all of which add to the charm of the space. Here are a few snapshots from before and after the renovation - including ikea hacks, outdoor loo and all! 

Kitchen before


Kitchen after


Sitting room before 

Sitting room after

The pair peeled back the laminate floor to discover a beautiful wood floor - what a great discovery! Wallpaper from BörÃ¥stapeter adds a cosy touch to the room and helps draw nature indoors. 


The hall before 


Hall after 
Alex and Erika picked up an IKEA chest of drawers for a song (100 SEK - or 8 quid!) and painted it in a soft grey-green. Rabarber 1792 wallpaper adds a vibrant feel to the space. 


Outdoor loo before

It's not that uncommon for Swedish cottages to have an outdoor loo with no running water. I recently stayed at Helen's lovely place which was the same! It took me back to the days I spent Grandmother's house. Granny Ruth had an outdoor and indoor loo. We never used the outdoor one as it was always full of spiders! 

But the ones I've experienced in Sweden are so much fresher - especially after a make-over! 

Outdoor loo 

Erika and Alex have completely spruced up their outdoor loo - adding wood panelling which has been painted in the same hue as the cottage interior. 

They've also added home comforts such as a hand towel, magazines, fresh wildflowers and perhaps most importantly - a vintage water tank for washing hands. 

The standout piece though, has to be the magnificent antique dresser - it adds such a homely touch! 

What a difference! 

Their garden is simply magical - especially in summertime. It has me dreaming of midsummer (which is only 8 weeks away!) and long summer days alfresco! 

I hope you enjoyed this before and after feature as much as I have! 

If you'd like to see more snapshots from Alex and Erika's home head on over to @gubbetorp.

You might also like to feel inspired by other idyllic Swedish summer cottages here: 


And of course, before and afters

Here's to a sunny, carefree weekend ahead! 

See you Monday friends! 

Niki

Photography: @gubbetorp shared with kind permission

Twitter FaceBook

Pin It
8

Tiny Cabin Bathroom Sneak Peek - Plus a Few Questions!

*GSI Ceramica and Cristina Rubinetterie are kindly partnering in our project. 

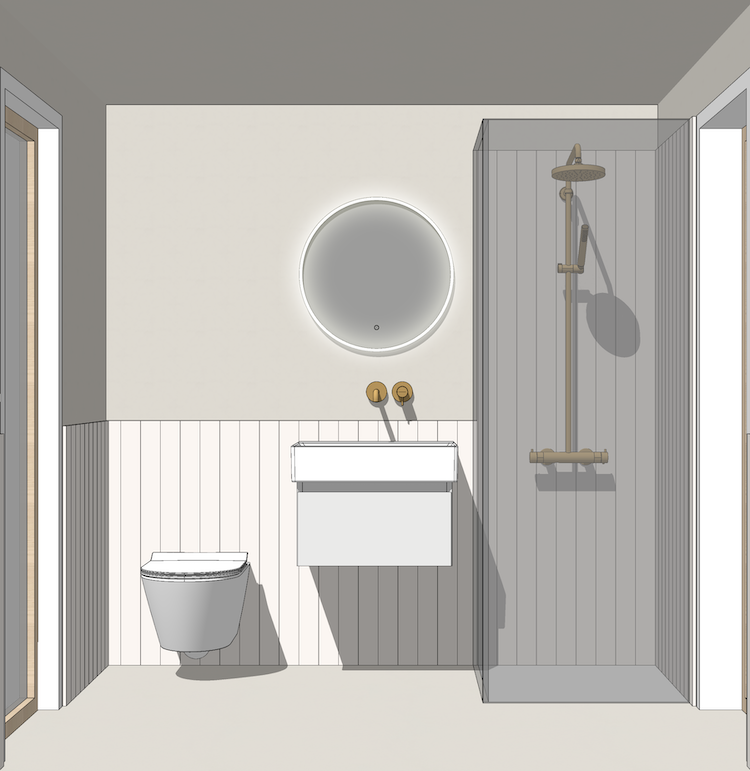
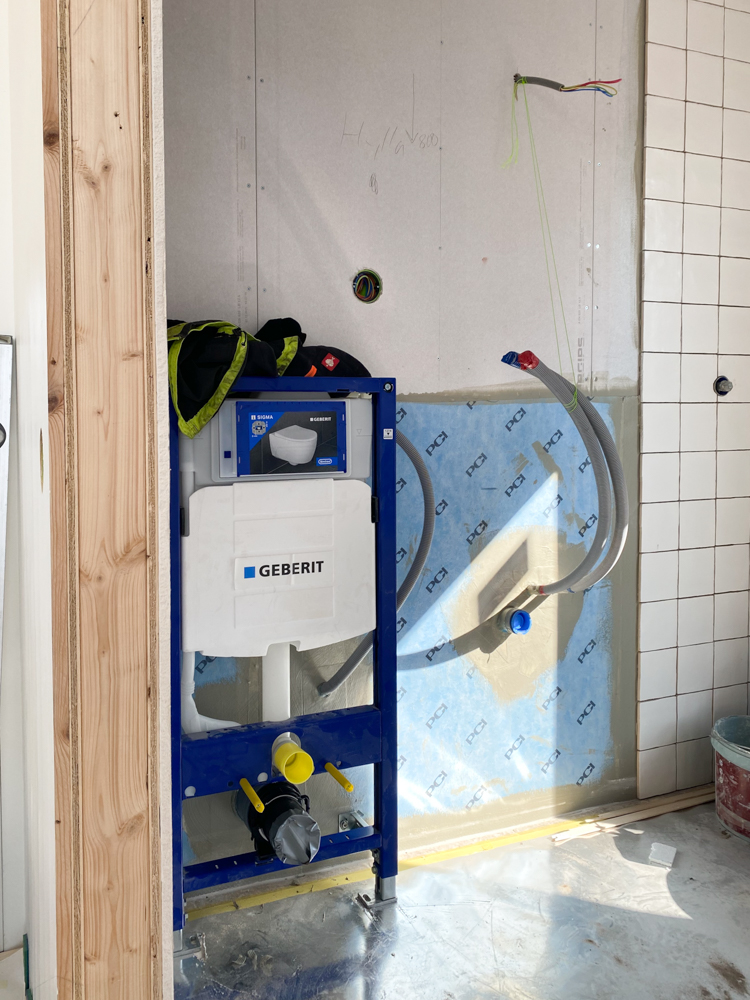
I can't tell you how much progress we've made in the bathroom at the cabin* since I shared the original plans. After a copious amount of work (who knew a 3.6 m2 (38f2) bathroom could take up so much time?), it's finally coming together! In fact, it's almost finished, woohoooo! Here are some snapshots of the progress which I snapped with my phone. Oh, and I'd love to hear your thoughts on some of the final details too. 

It's been fun to see the space come together - one layer at a time, starting from the bare bones. 

Wall tiles
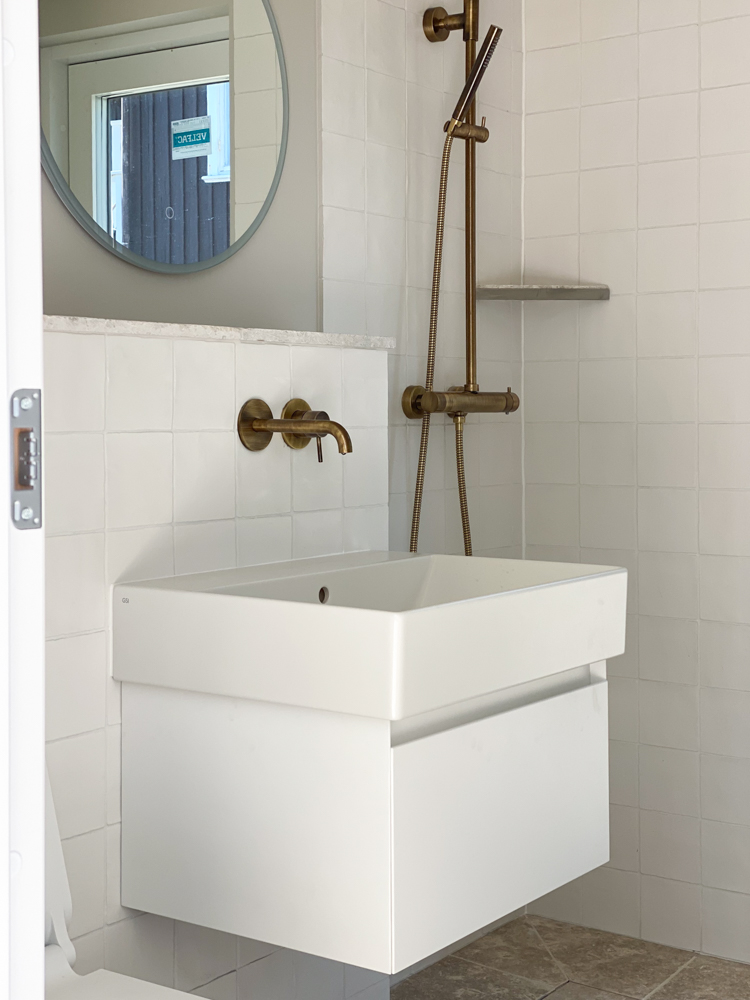
For the shower and lower section of the wall we chose matt white square tiles with a simple white grouting (I felt this would give a cleaner, less fussy look in such a small space). 

Wall mounted loo and taps
I love a wall hung loo (specifically the WC Kube X from GSI Ceramica) they look so sleek and also help to contribute to an airier feel in a small space. I was also keen to install wall mounted taps (I selected the Basin Mixer CRITV257 from series Tricolore Verde by CRISTINA Rubinetterie)However, in order to achieve this we needed to build out a section of the wall by 15 cm (wide enough to fit a Gerberit cistern). I was a little nervous as it's already a narrow bathroom - but actually, I'm thrilled with the result. The shelf has turned out to be a real bonus!  

Bathroom paint colour
For the ceiling and walls (without tiles) I went for Kalk from the Jotun Lady Aqua bathroom range. It's a lovely, soft, warm tone which compliments the matt white sink and loo as well as the stone floor. 

Wall mounted sink and cabinet
Here's a close up of the sleek, timeless Kube X washbasin (60 x 47) in matt white. I'm so happy with it as well as the Prisma Unit cabinet (also from GSI Ceramica) - it's perfect for storage, and since the entire unit is mounted, it gives the illusion of space. 

Taps and shower
Above and below you can see a close up of the basin Mixer CRITV257 and External Thermostatic shower mixer with overhead and hand shower CRITV486 from CRISTINA Rubinetterie. The 'brushed old brass' finish has a beautiful patina and adds so much texture. 

Shower door
We still need to add a glass wall (80 cm wide) between the shower and sink. However, I haven't decided if we also need a shower door (70 cm wide) across the front, what do you think? 

Floor tiles and details
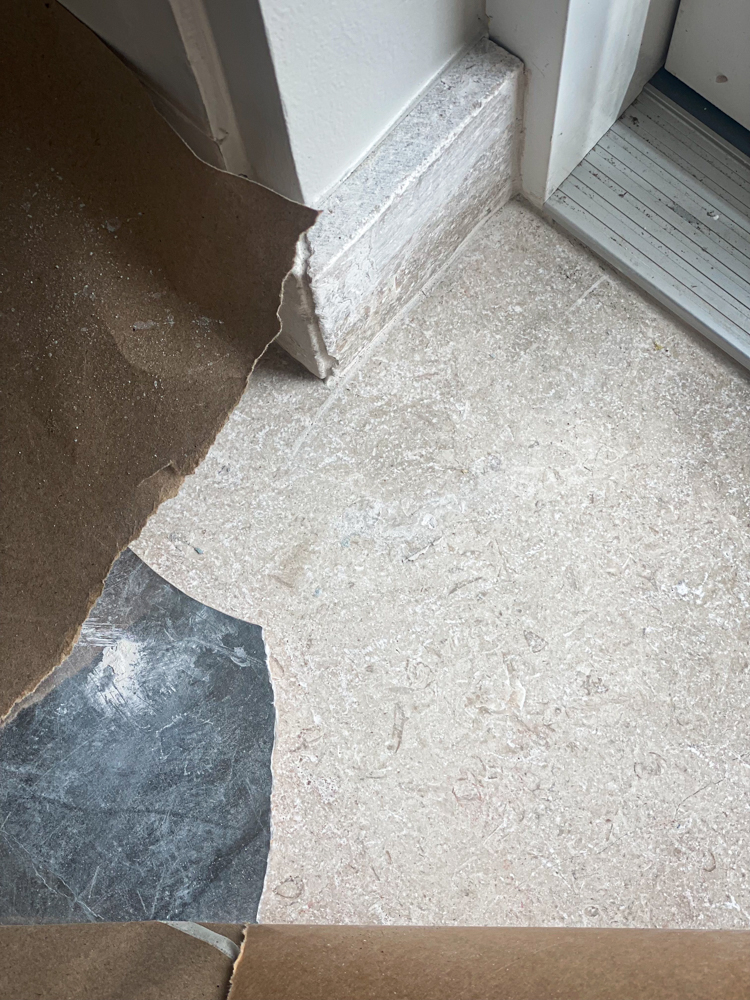
And finally - the stone floor. I sourced the Tumbled Turtle tiles from Swedish brand Stiltje (I love the owner Pamela; she has incredible taste!). We really splurged on these and once the floor had been laid, there were a few tiles leftover which we used for the ledge above the sink and a corner shelf in the shower.  

I hope you like what we've done so far! I'm so excited the bathroom is nearly finished. We're on the home straight! 
 
The next step is to add:

1. A shower wall and potentially a shower door 
2. A privacy film inside the garden glass door (or should we go for a blind?) 
3. A loo roll holder - any thoughts on where this should go? 
4. Hooks for towels, robes, swimwear etc. 
5. All our toiletries! 

I'd love to hear your two pennies worth! 

Hopefully it will all be finished in the next few weeks - I'm so looking forward to sharing the final reveal once everything is in place!

Niki

All photos taken with my iPhone. 

*For those of you who are new to My Scandinavian Home - Per and I are building a 30 m2 (323 f2) cabin in the garden of my Mother-in-law's summer cottage on Sweden's West coast. You can see the plans here

Twitter FaceBook

Pin It
25

Before & after: A Copenhagen Town House Is Transformed Into a Fresh Family Home


I love seeing the before and after shots of a space, do you? It really demonstrates the vision and level of work that has gone into an interior. Today, I thought I'd take you on a tour of Maria Elisabeth's house in Frederiksberg, Copenhagen. I once had the pleasure of visiting a house on the same street for my book The Scandinavian Home - and fell in love with the leafy neighbourhood. 

When Maria Elisabeth and her boyfriend Niels bought the house in 2019 it needed work. "It was in a state and was in really bad shape," Marie Elisabeth recalls. "There was a hole in the roof, water damage etc." The pair set about renovating every room single in the house, putting in a new kitchen and bathroom as well replacing the floors in the process. The couple moved in in 2020 and now enjoy a beautiful home with their three children Carl Oscar (7). Esther Emilie (5) and Wilmar Emil (1). Here are some snapshots of how it looked before they started, and how it looks today: 

Kitchen before

Kitchen after

The kitchen was completely gutted. Today cabinets from Stilleben Architects - who pride themselves on kitchens and interiors made to last for generations - add a beautiful, timeless touch, while the bare upper walls help to bring the look up to date. 

The walls have been painted in Clunch Farrow & Ball


Living room before

Living room after

The sitting room areas were also given a total overhaul - with the exception of the beautiful parquet floor which was carefully maintained. 

The custom-built cabinetry and shelves around the doorway are a classic Danish trick for displaying books, art and other items.

The walls have been painted in colour code NCS 1000-N. 


Hallway / stairs before

Hallway after

A fitted carpet was stripped away to reveal the wood, which has then been given a fresh lick of white paint. The walls have been painted in Raw Canvas by Jotun

Guest bedroom before

Guest bedroom after

The A-frame ceiling has been partly filled in to seal the hole in the roof and add insulation, while part of the beam structure (which has been stained white) adds character to the space. 

The walls have been painted in Touch of Grey by File Under Pop

Bathroom before

Bathroom after


The dated tiles were swapped out in favour of a cleaner finish - including a terrazzo floor from RÃ¥form- and the shower was reduced in size to make space for a loo. 

The love taps, shower head and loo flush are all by Vola. The walls have been painted in Cream by File Under Pop and the lamp is from Flos


Garden before

Garden after

The garden was reconfigured to include a storage unit with a turf roof - as well as two separate social areas, one for dining and one for relaxing! 

All in all, a beautiful, fresh transformation - which I understand, was a lengthy labour of love - but so worth it! 

Is there anything that stood out to you about Maria Elisabeth's renovation? You can see more pics over at @husetpaafrederiksberg and also find out more details about every room in her instagram highlights. 

Would you like to see a few other Danish before and after tours today? I love these: 

A dated 1950s danish house gets a fabulous makeover 

I hope you have felt as inspired by all these renovations as much as I have been! Got to love the Danish flair for design! 

Niki

Photography @husetpaafrederiksberg - shared with kind permission. 

Twitter FaceBook

Pin It
8

Subscribe To My Scandinavian Home

Subscribe to My Scandinavian Home

skovby ad


site by ANAAR

This website uses cookies to ensure you get the best experience on our website.
MORE INFO